
In this Issue
- Crucifers: Cabbage white butterfly
- Leafy Greens: Leafminers
- Solanaceous Crops: Three-lined potato beetles
- Sweet Corn & Legumes: Seed maggots
- All: Grasshopper nymphs
- Production Information: Using straw for weed control
CRUCIFEROUS CROPS
Kale, Broccoli, Cabbage, Brussels Sprouts, Kohlrabi, Cauliflower, etc.
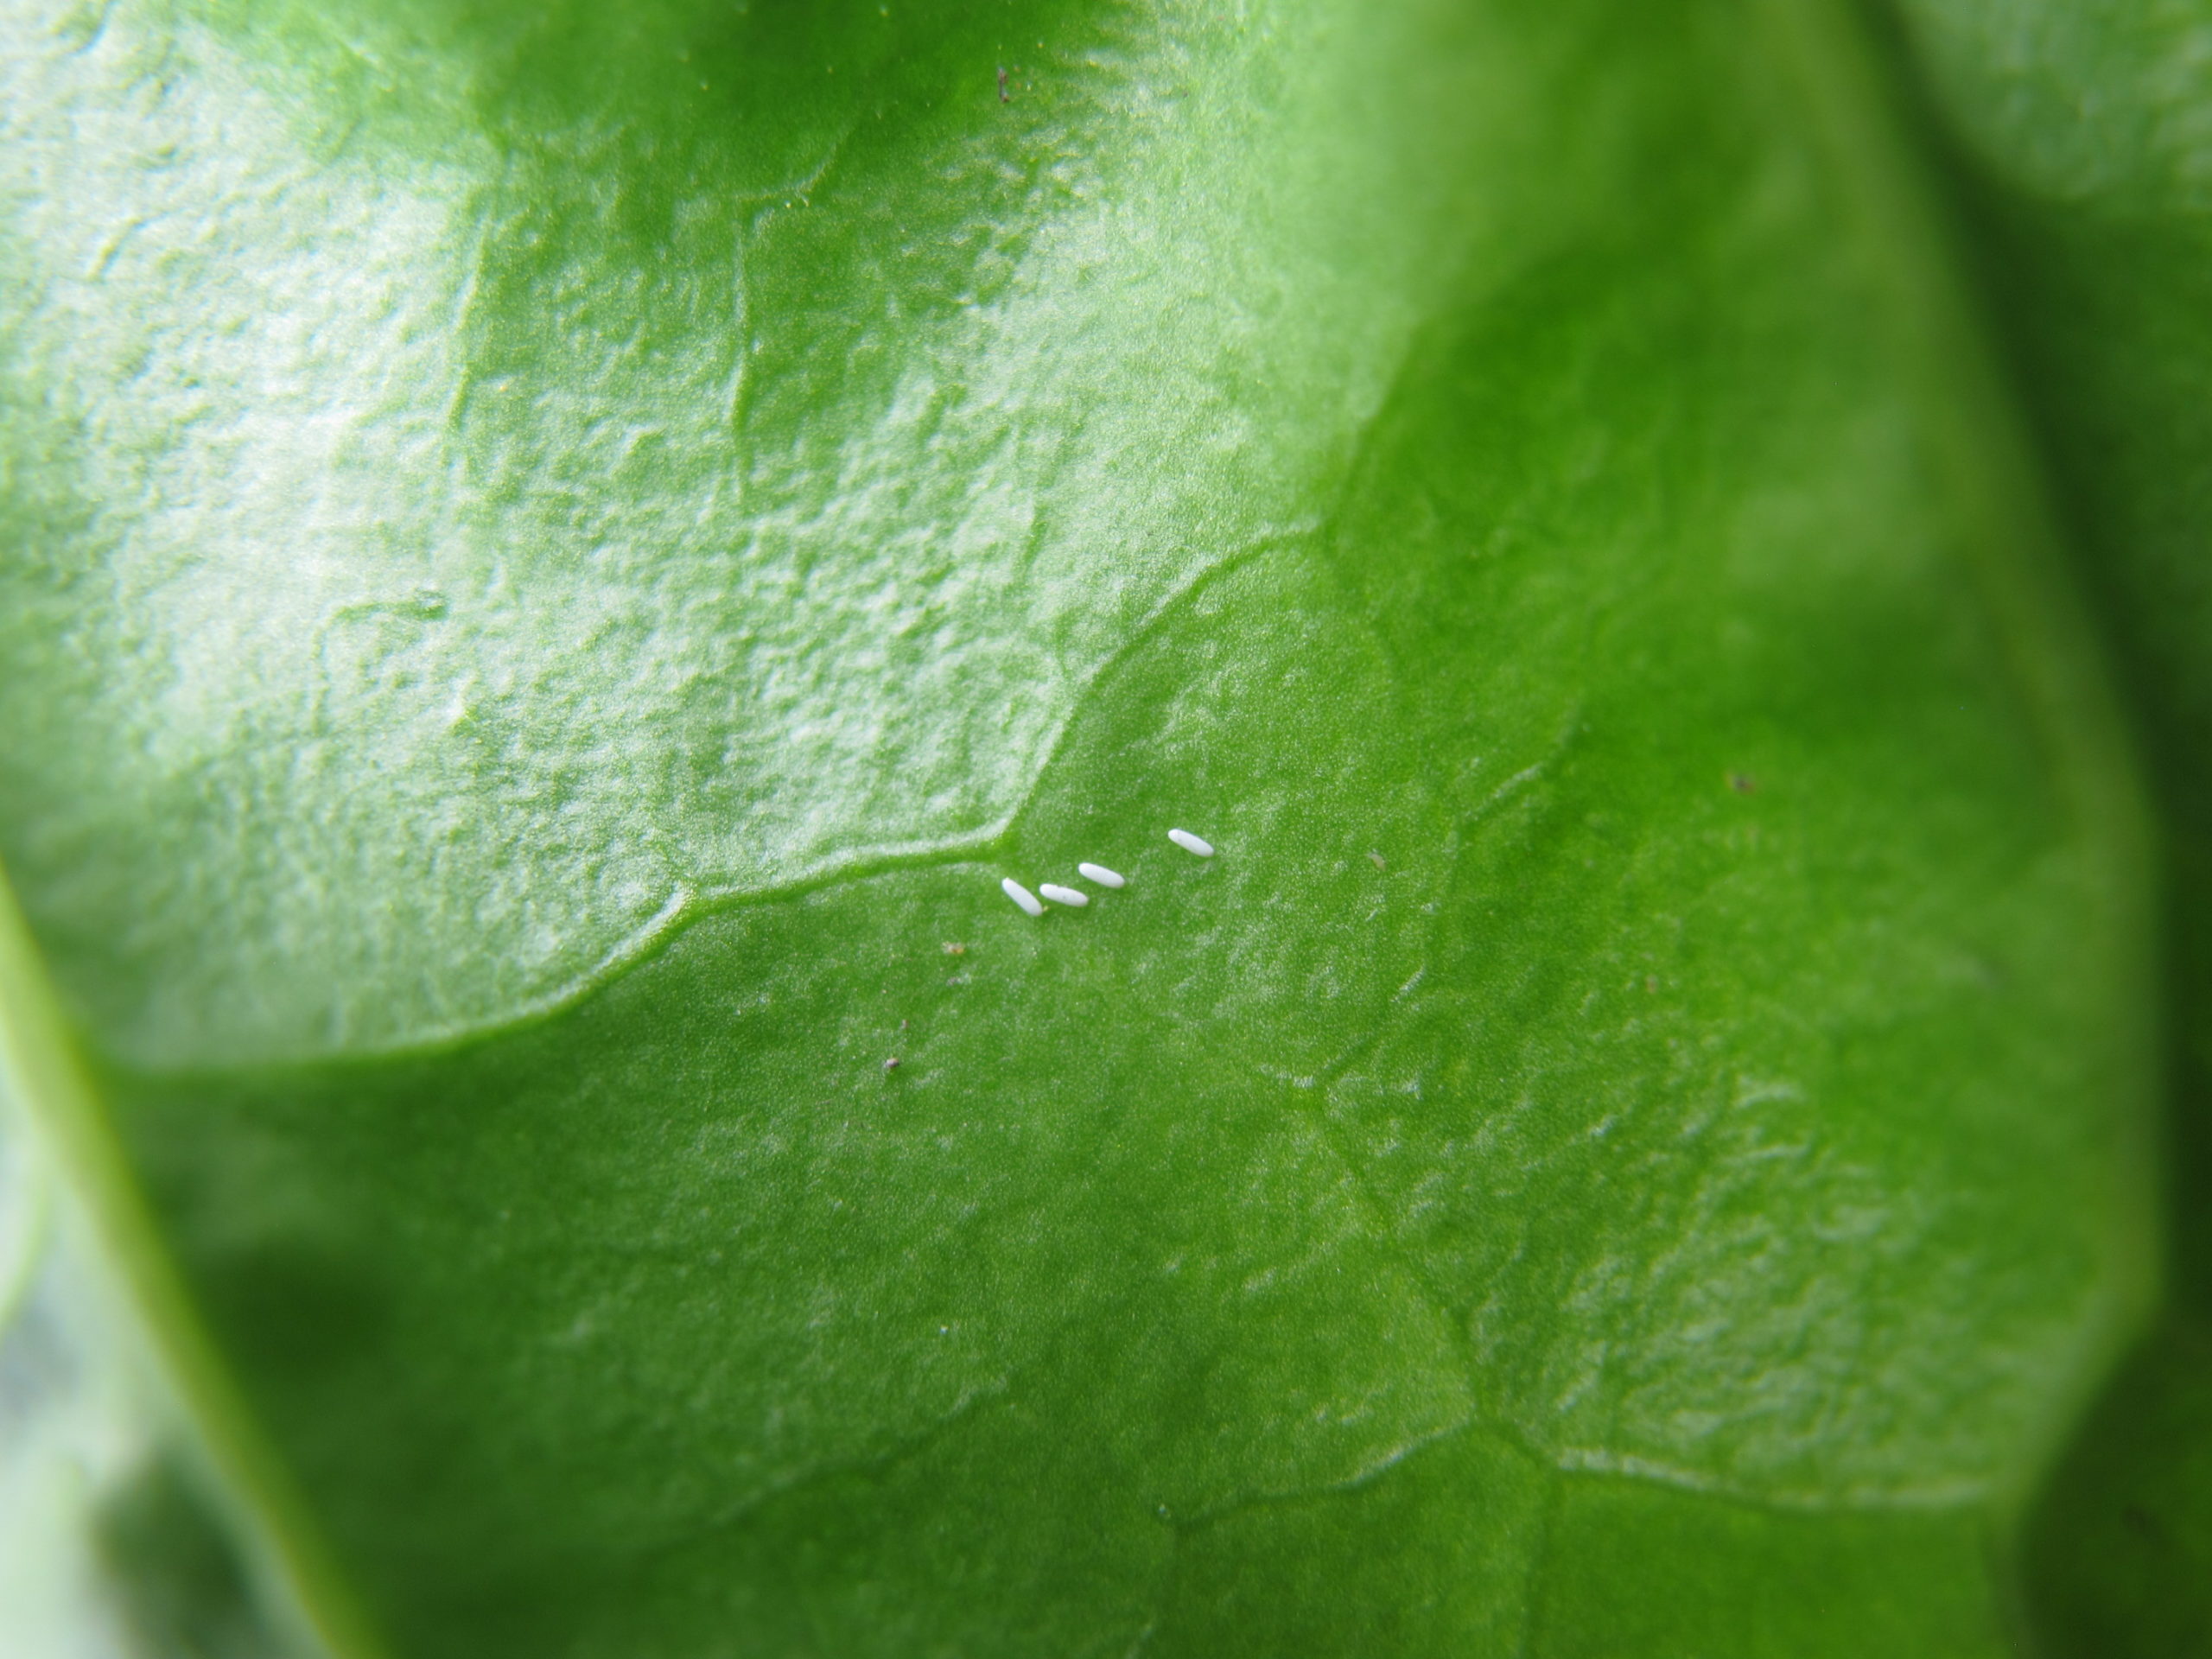
Cabbage White Butterfly
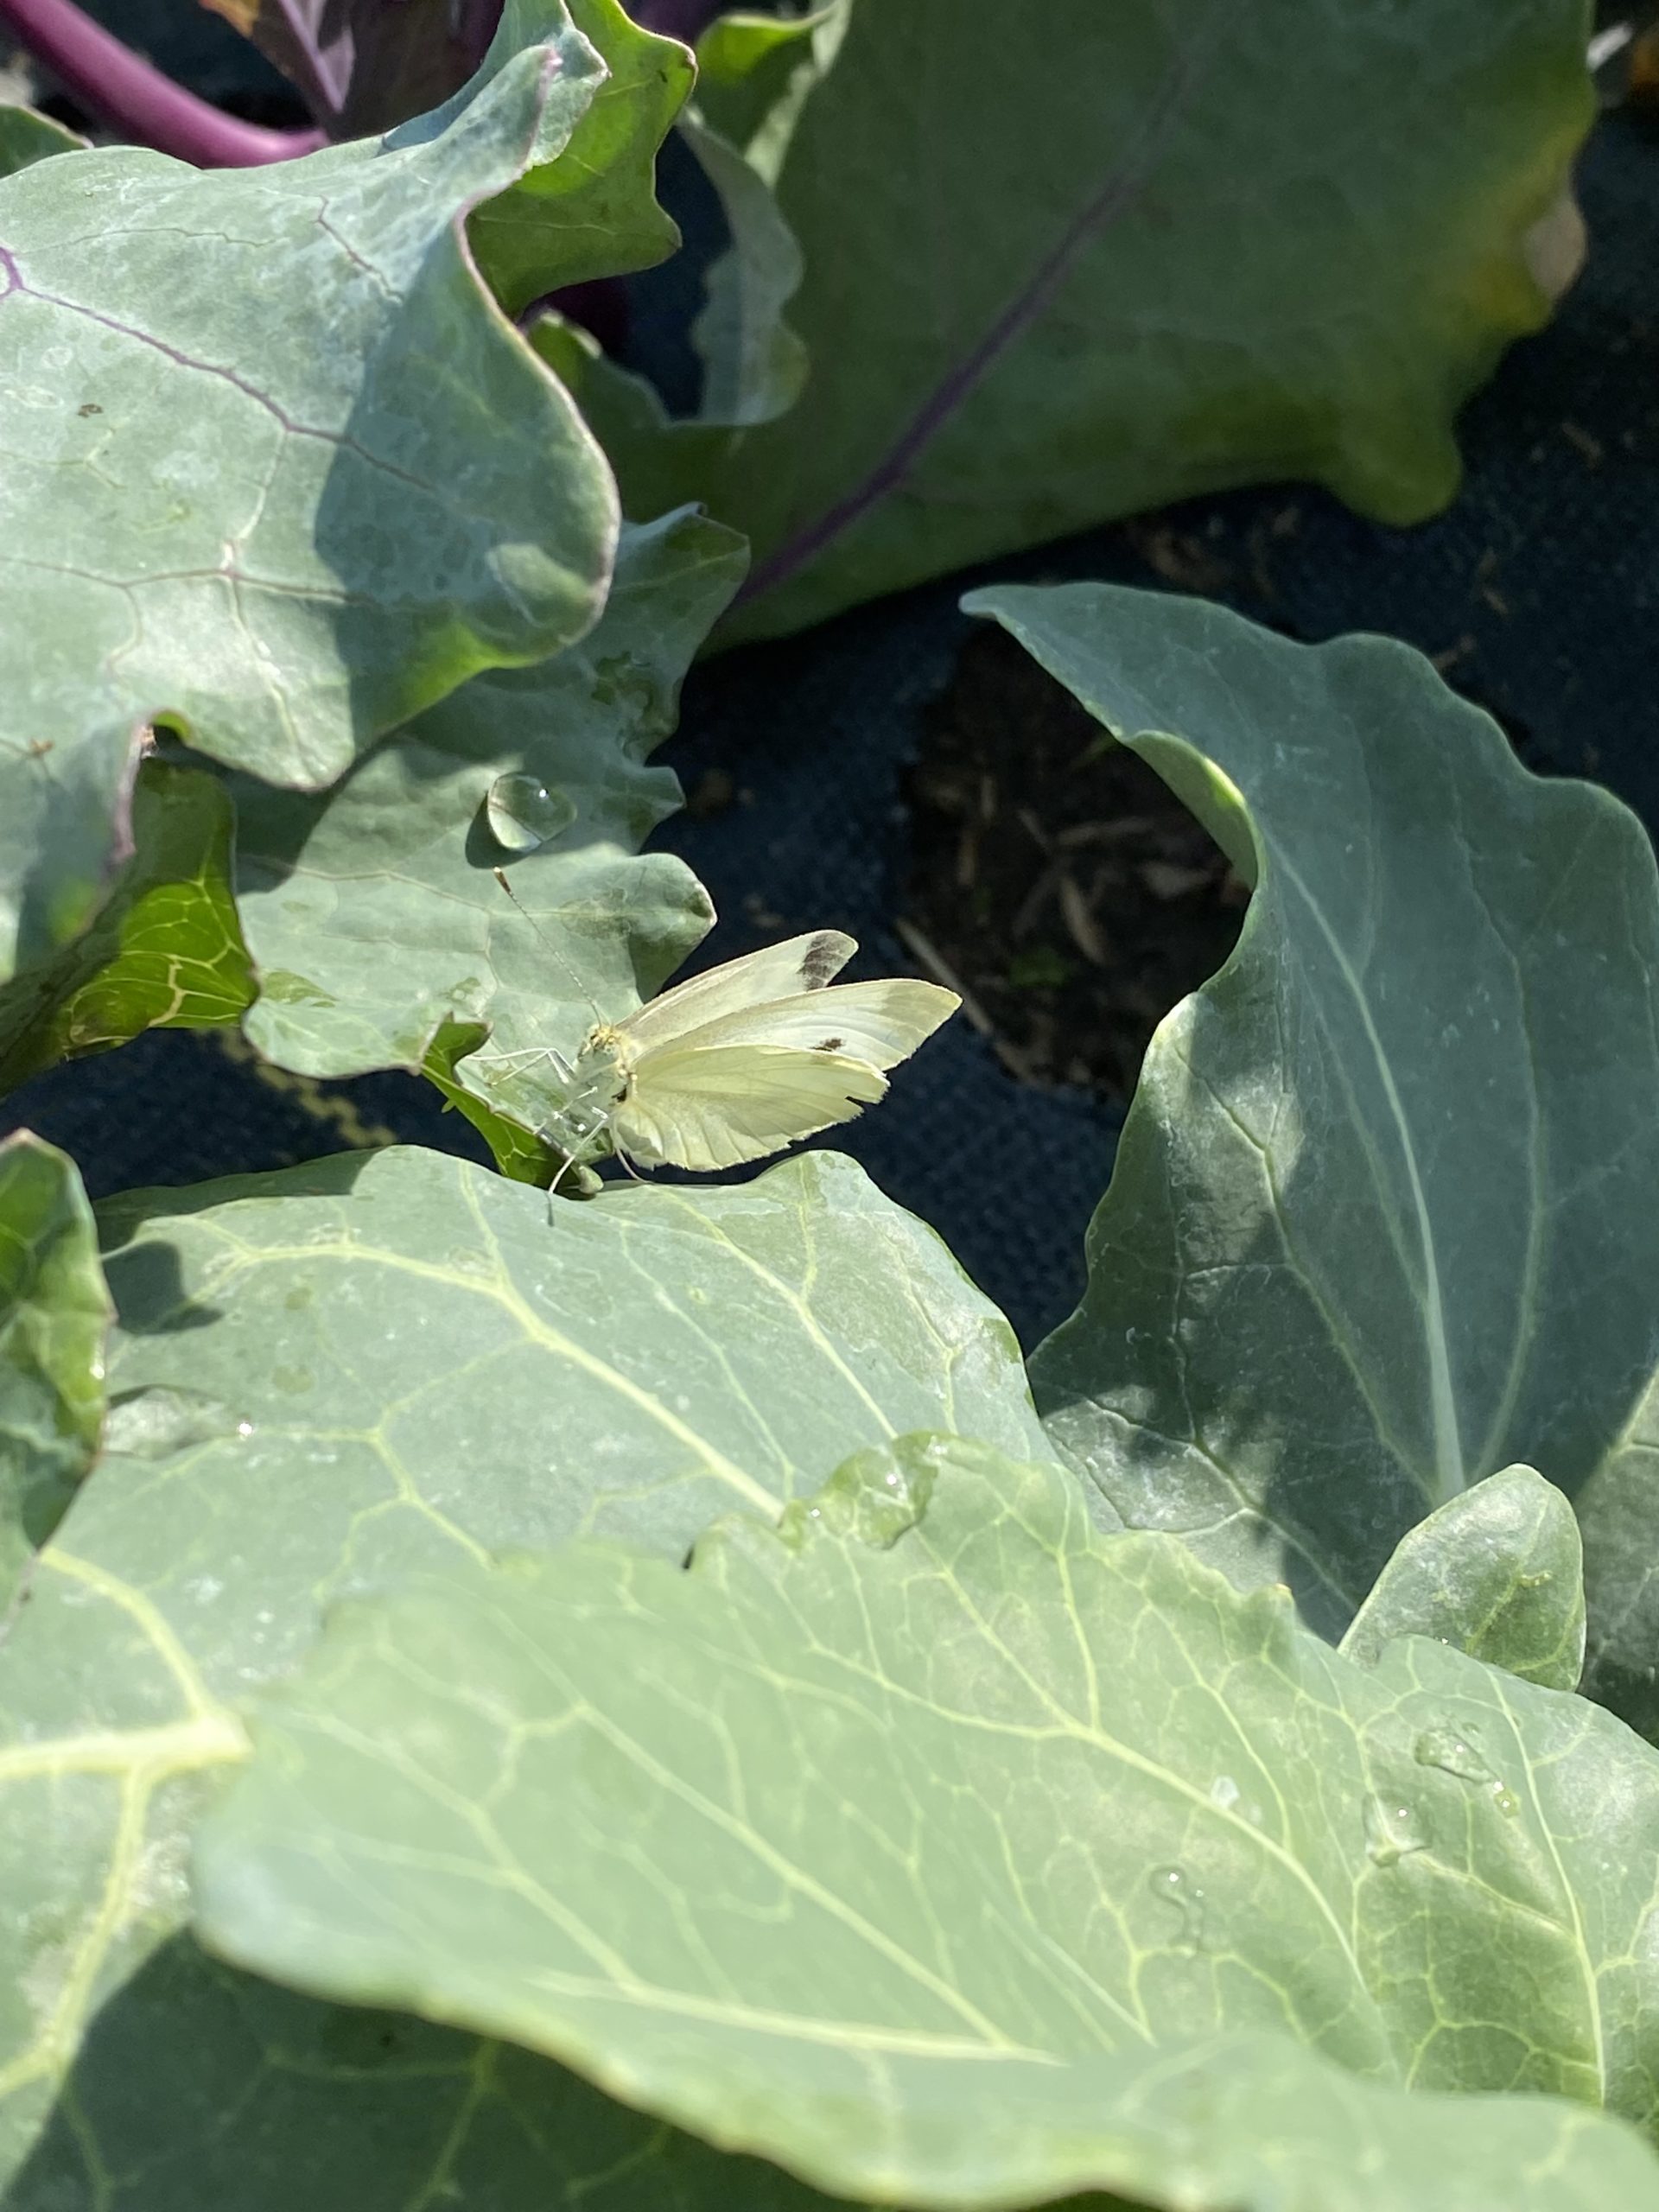
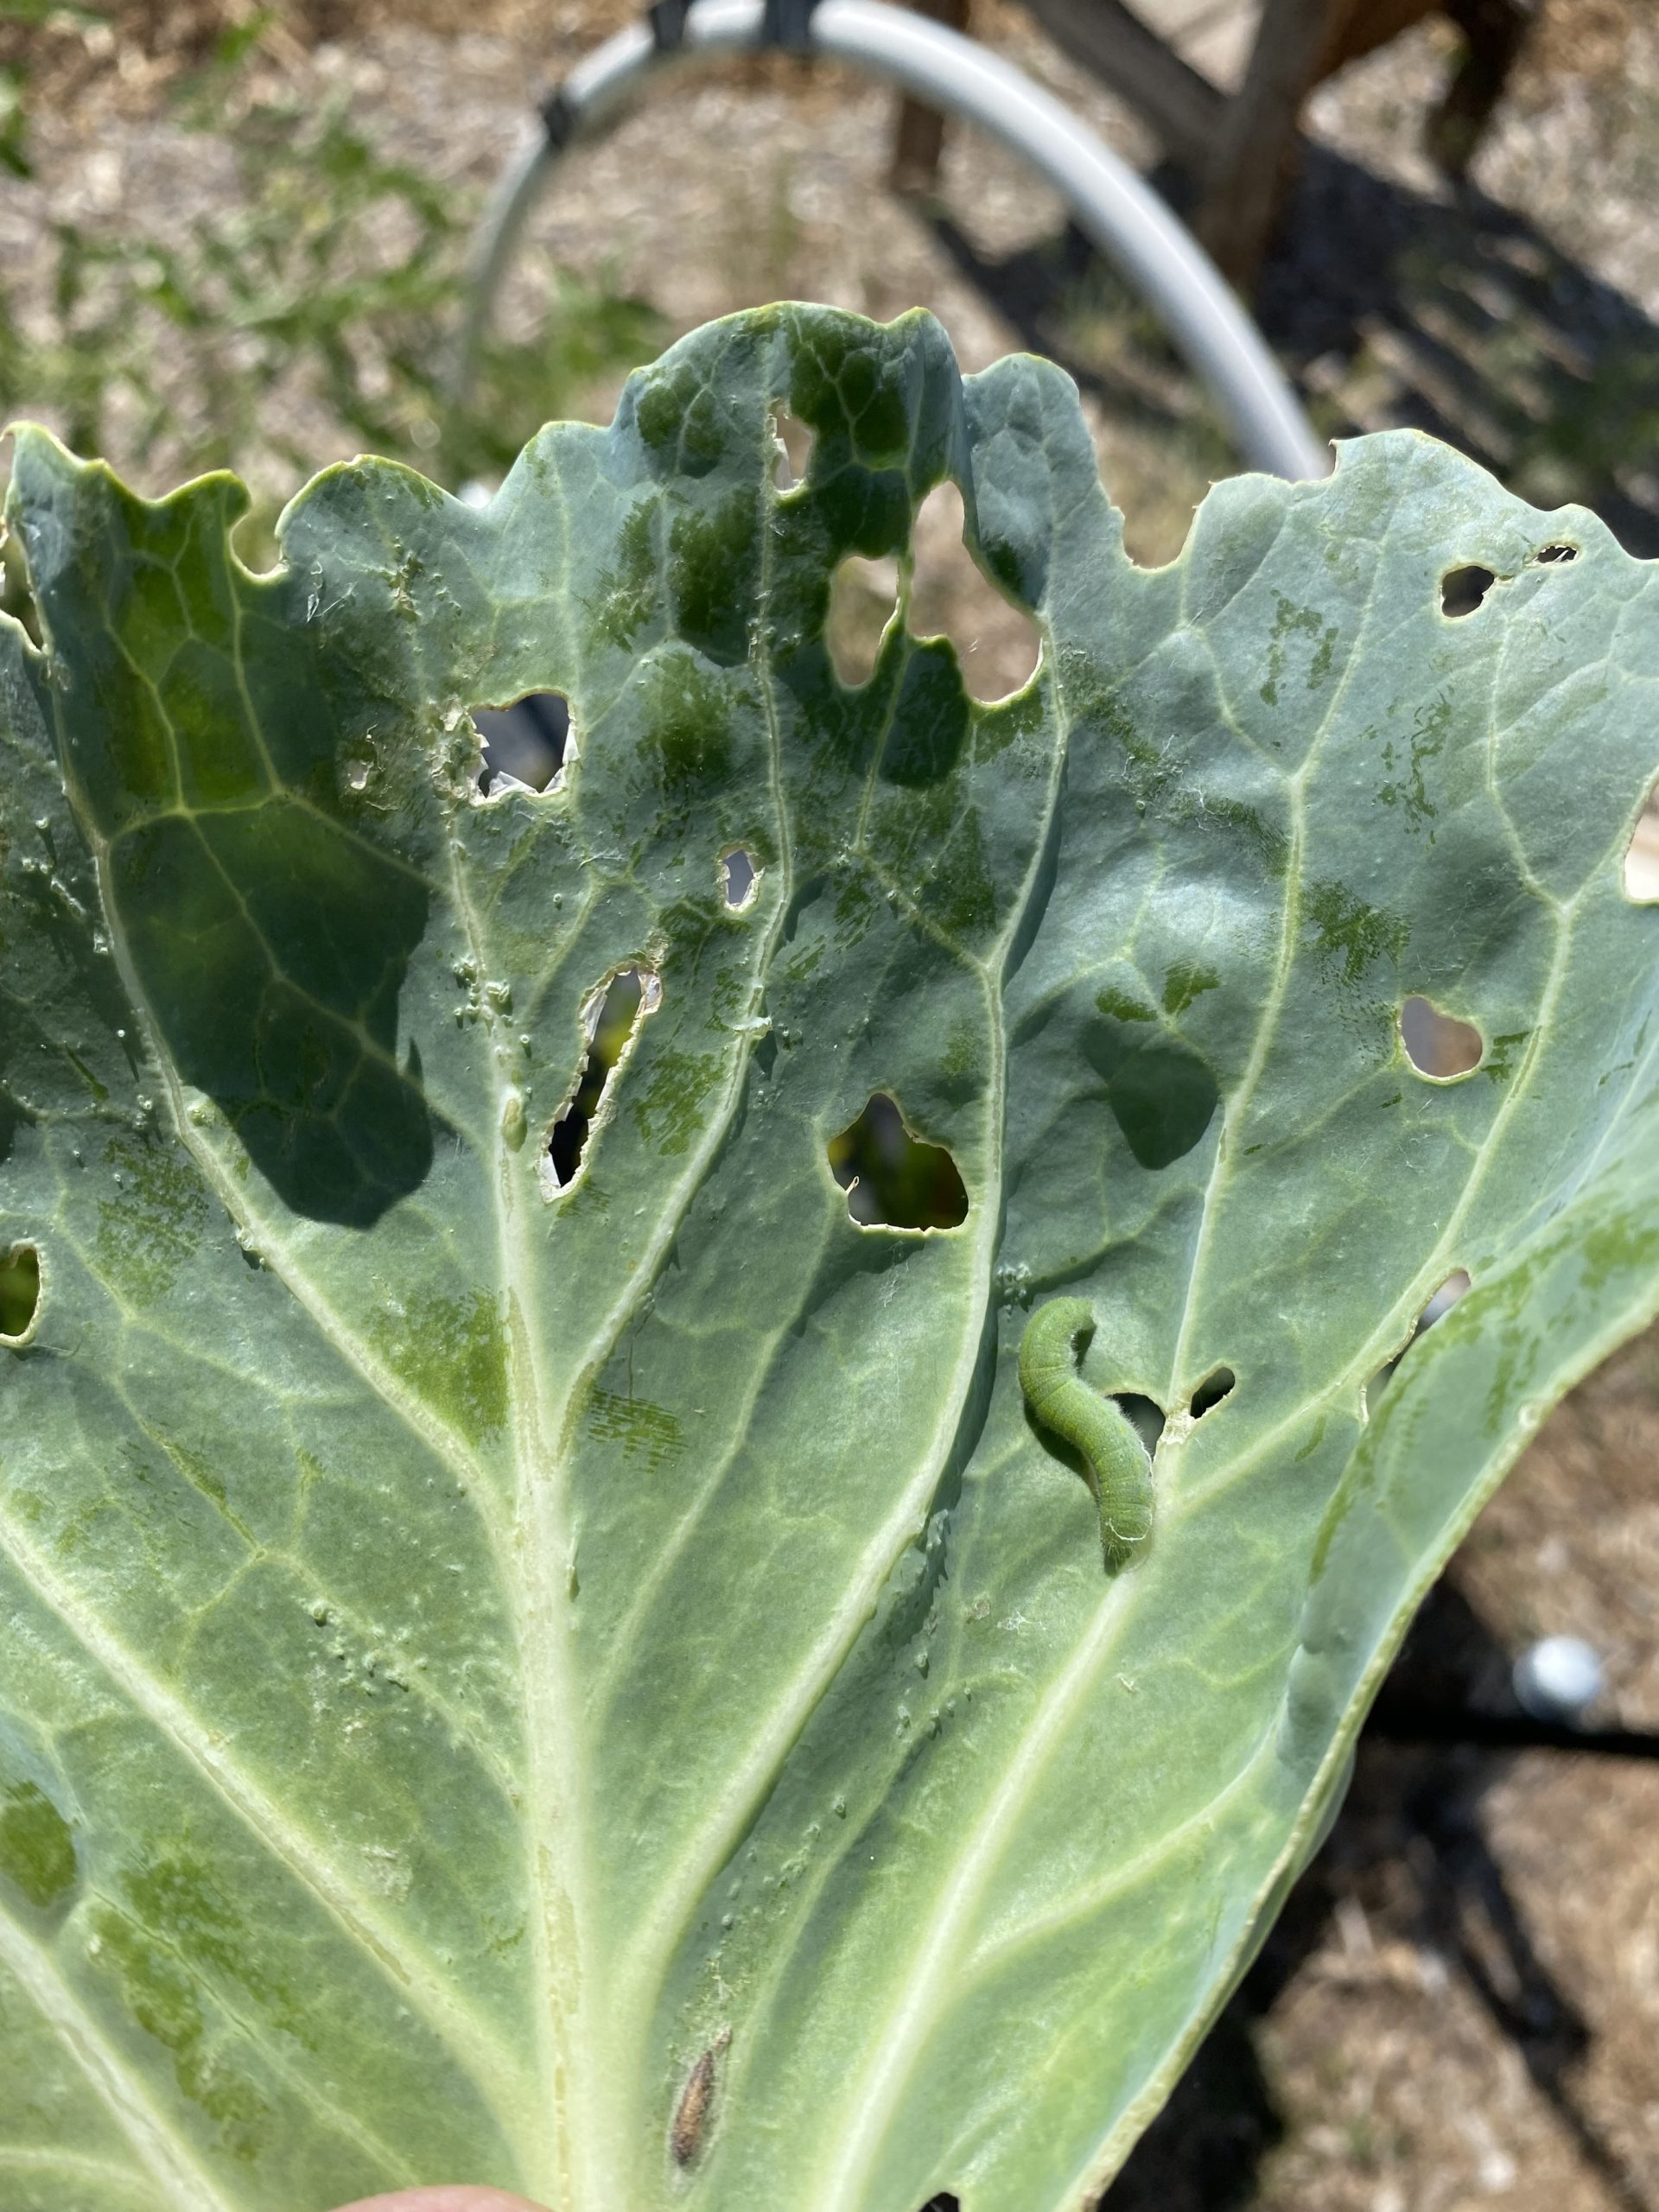
Pieris rapae, more commonly known as the small cabbage white butterfly, cabbage whites, or imported cabbage worms is a common butterfly species found throughout Utah. It is known for its white wings with black spots and can be considered a pest in gardens and agricultural fields due to its larvae feeding on various plants from the Brassicaceae family.
Identification: Adult butterflies have white wings with black spots on the upper side, while the undersides of the wings are yellowish with some black markings. The wingspan is around 4 to 6 centimeters. Adults fly with with a fluttering motion and can often be seen flying around gardens and open areas. Eggs are rocket-shaped, white to cream in color (eventually turning yellow) and laid on the undersides of leaves. Larvae are about 1¼ inches long at maturity with a green, velvet-like body, and a yellow-orange stripe down the center of the back. Pupae are green in color with yellow stripes on the back and sides; there is no outer cocoon.
Management:
- Row Covers: Covering your plants with lightweight spunbond fabric or insect netting can prevent adult butterflies from laying eggs on the leaves, thereby reducing the number of larvae.
- Handpicking: Inspect your plants regularly and remove any eggs, larvae, or pupae that you find. Look for yellowish eggs on the undersides of leaves or green caterpillars with a velvety appearance.
- Natural predators: Encourage natural predators of Pieris rapae, such as birds, spiders, and parasitic wasps, to visit your garden. Planting diverse vegetation can attract beneficial insects that feed on caterpillars.
Chemical Control: If the infestation is severe, you may consider using chemical control methods such as those listed here. An organic option includes Bacillus thuringiensis var. kurstaki (Bt), a naturally occurring soil bacterium that is toxic to caterpillars but safe for humans and other organisms. Always exercise caution when using insecticides and always follow the instructions on the label. Consider organic products to be more environmentally friendly and consider beneficial insects.
Click here for home-use products
Click here for commercial-use products
LEAFY GREEN CROPS
Various Lettuces, Spinach, Brassica greens, Chard, etc.
Leafminers
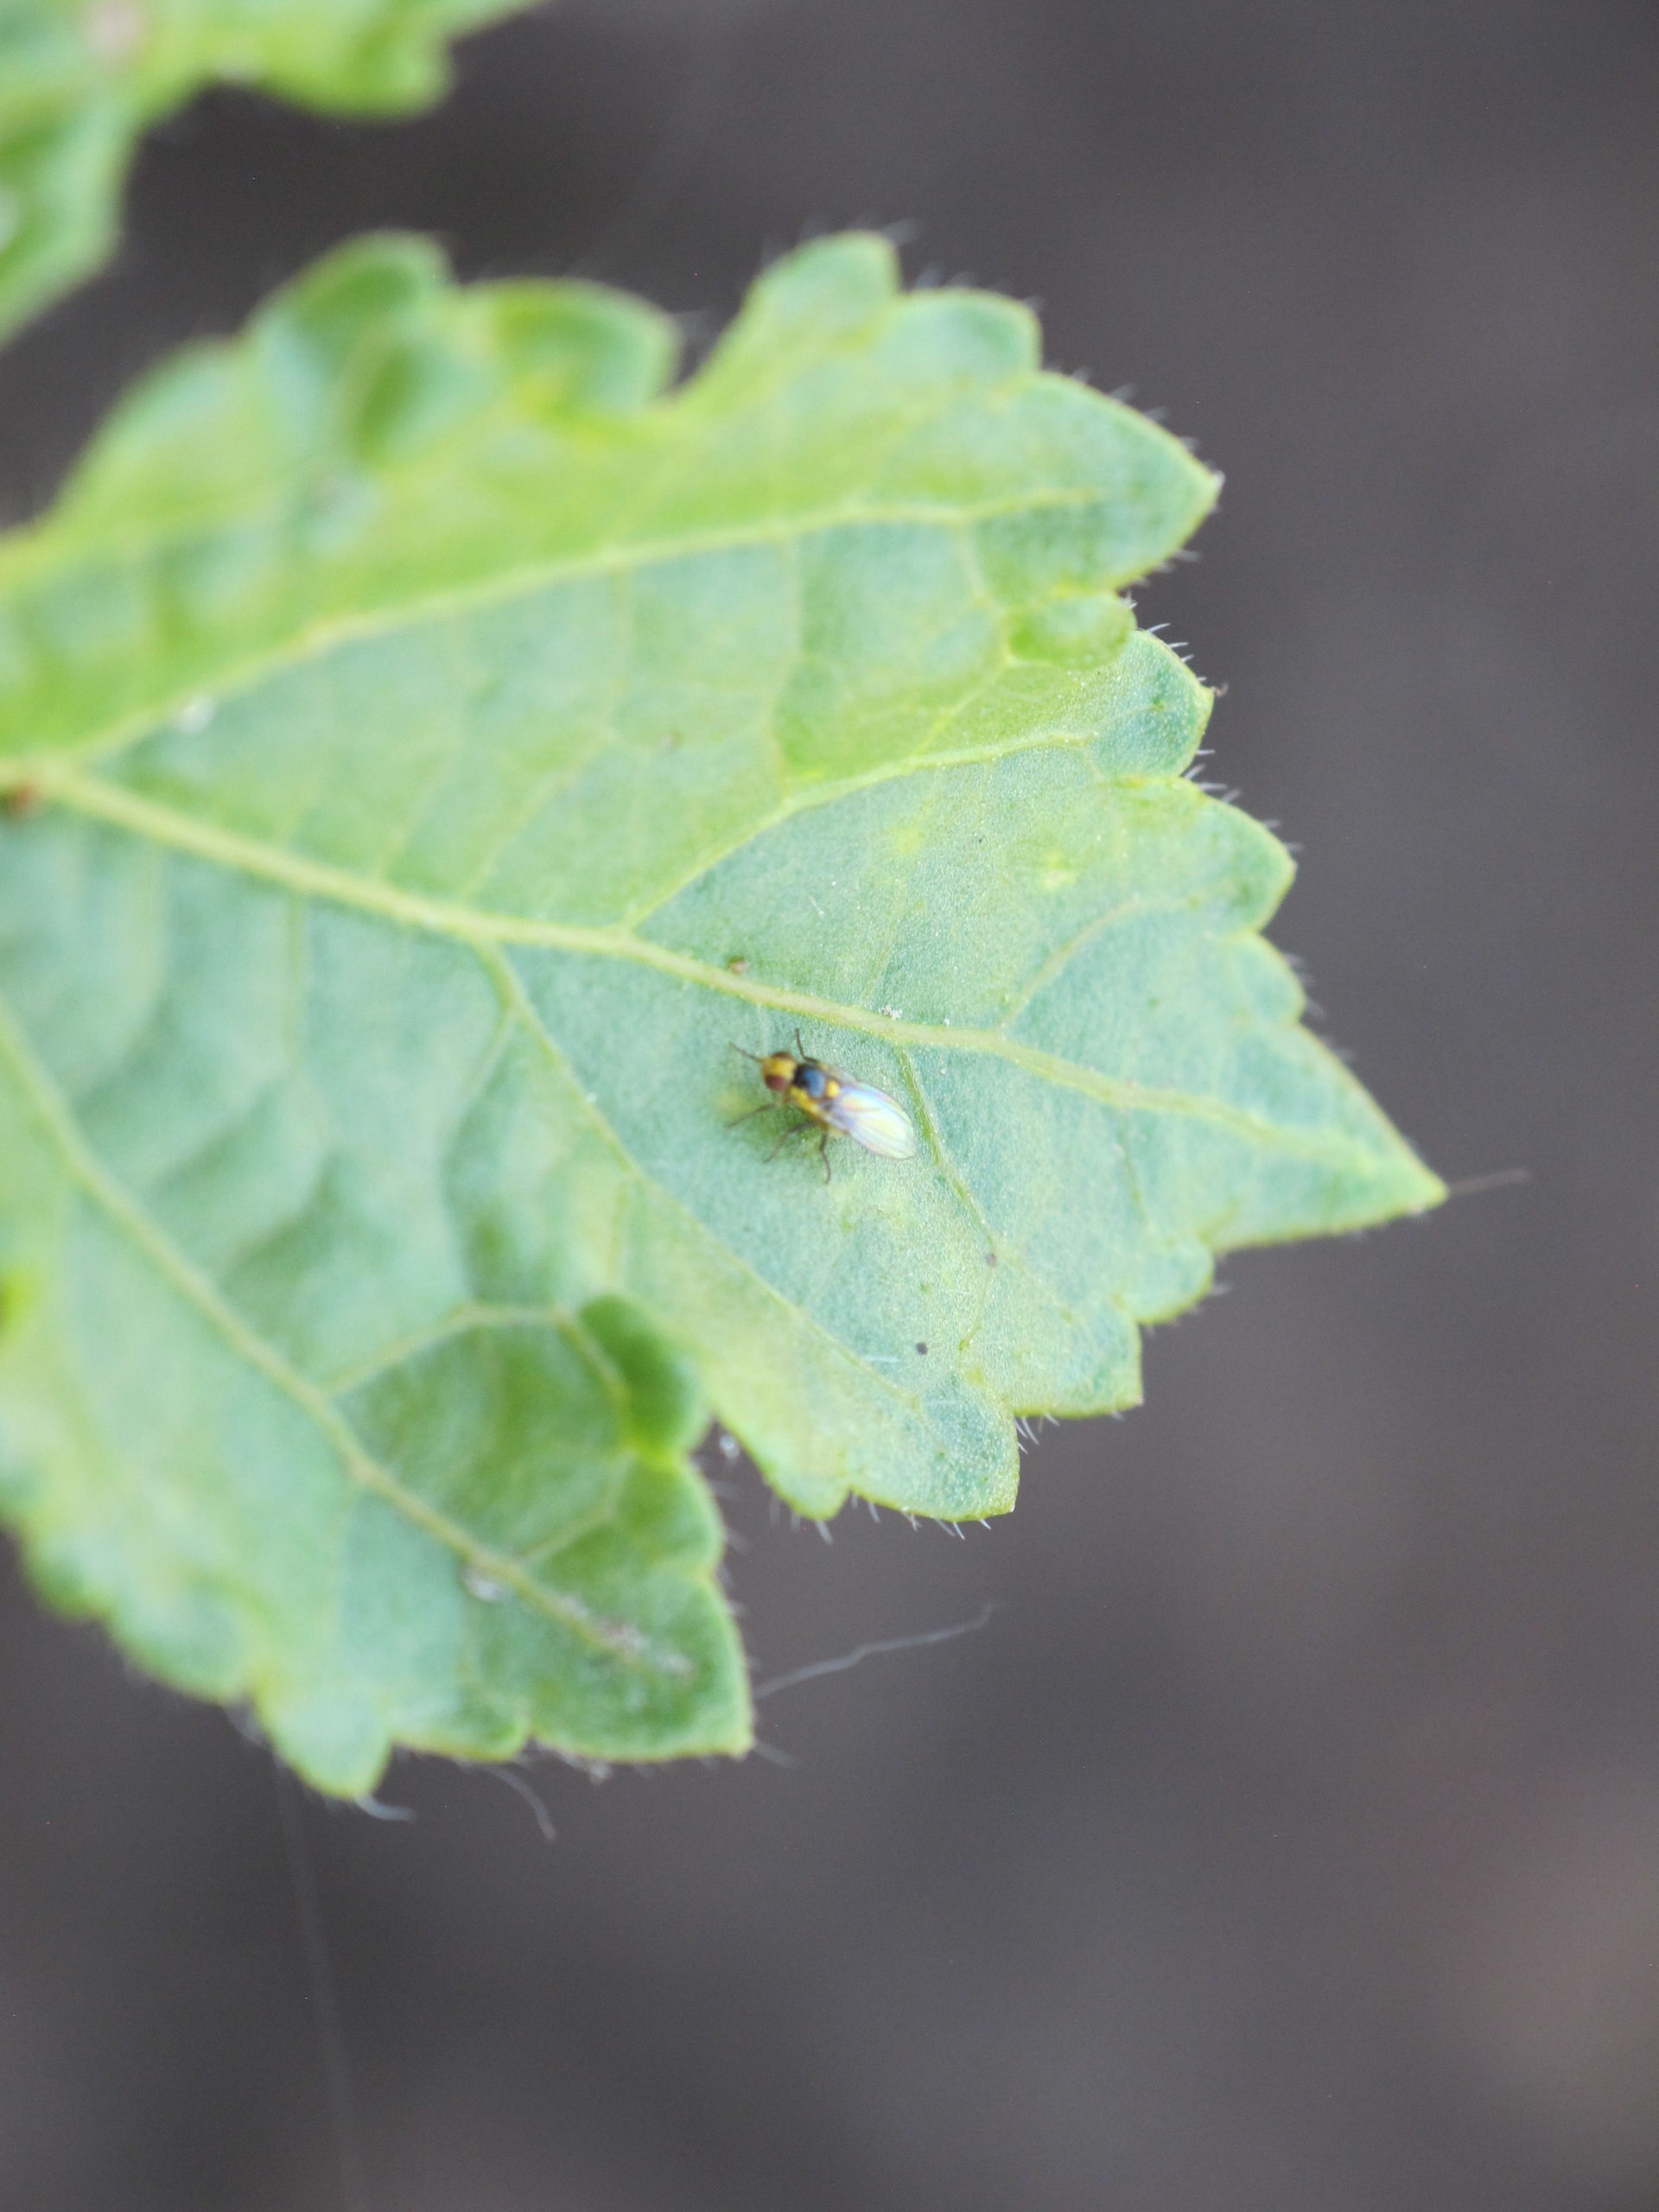
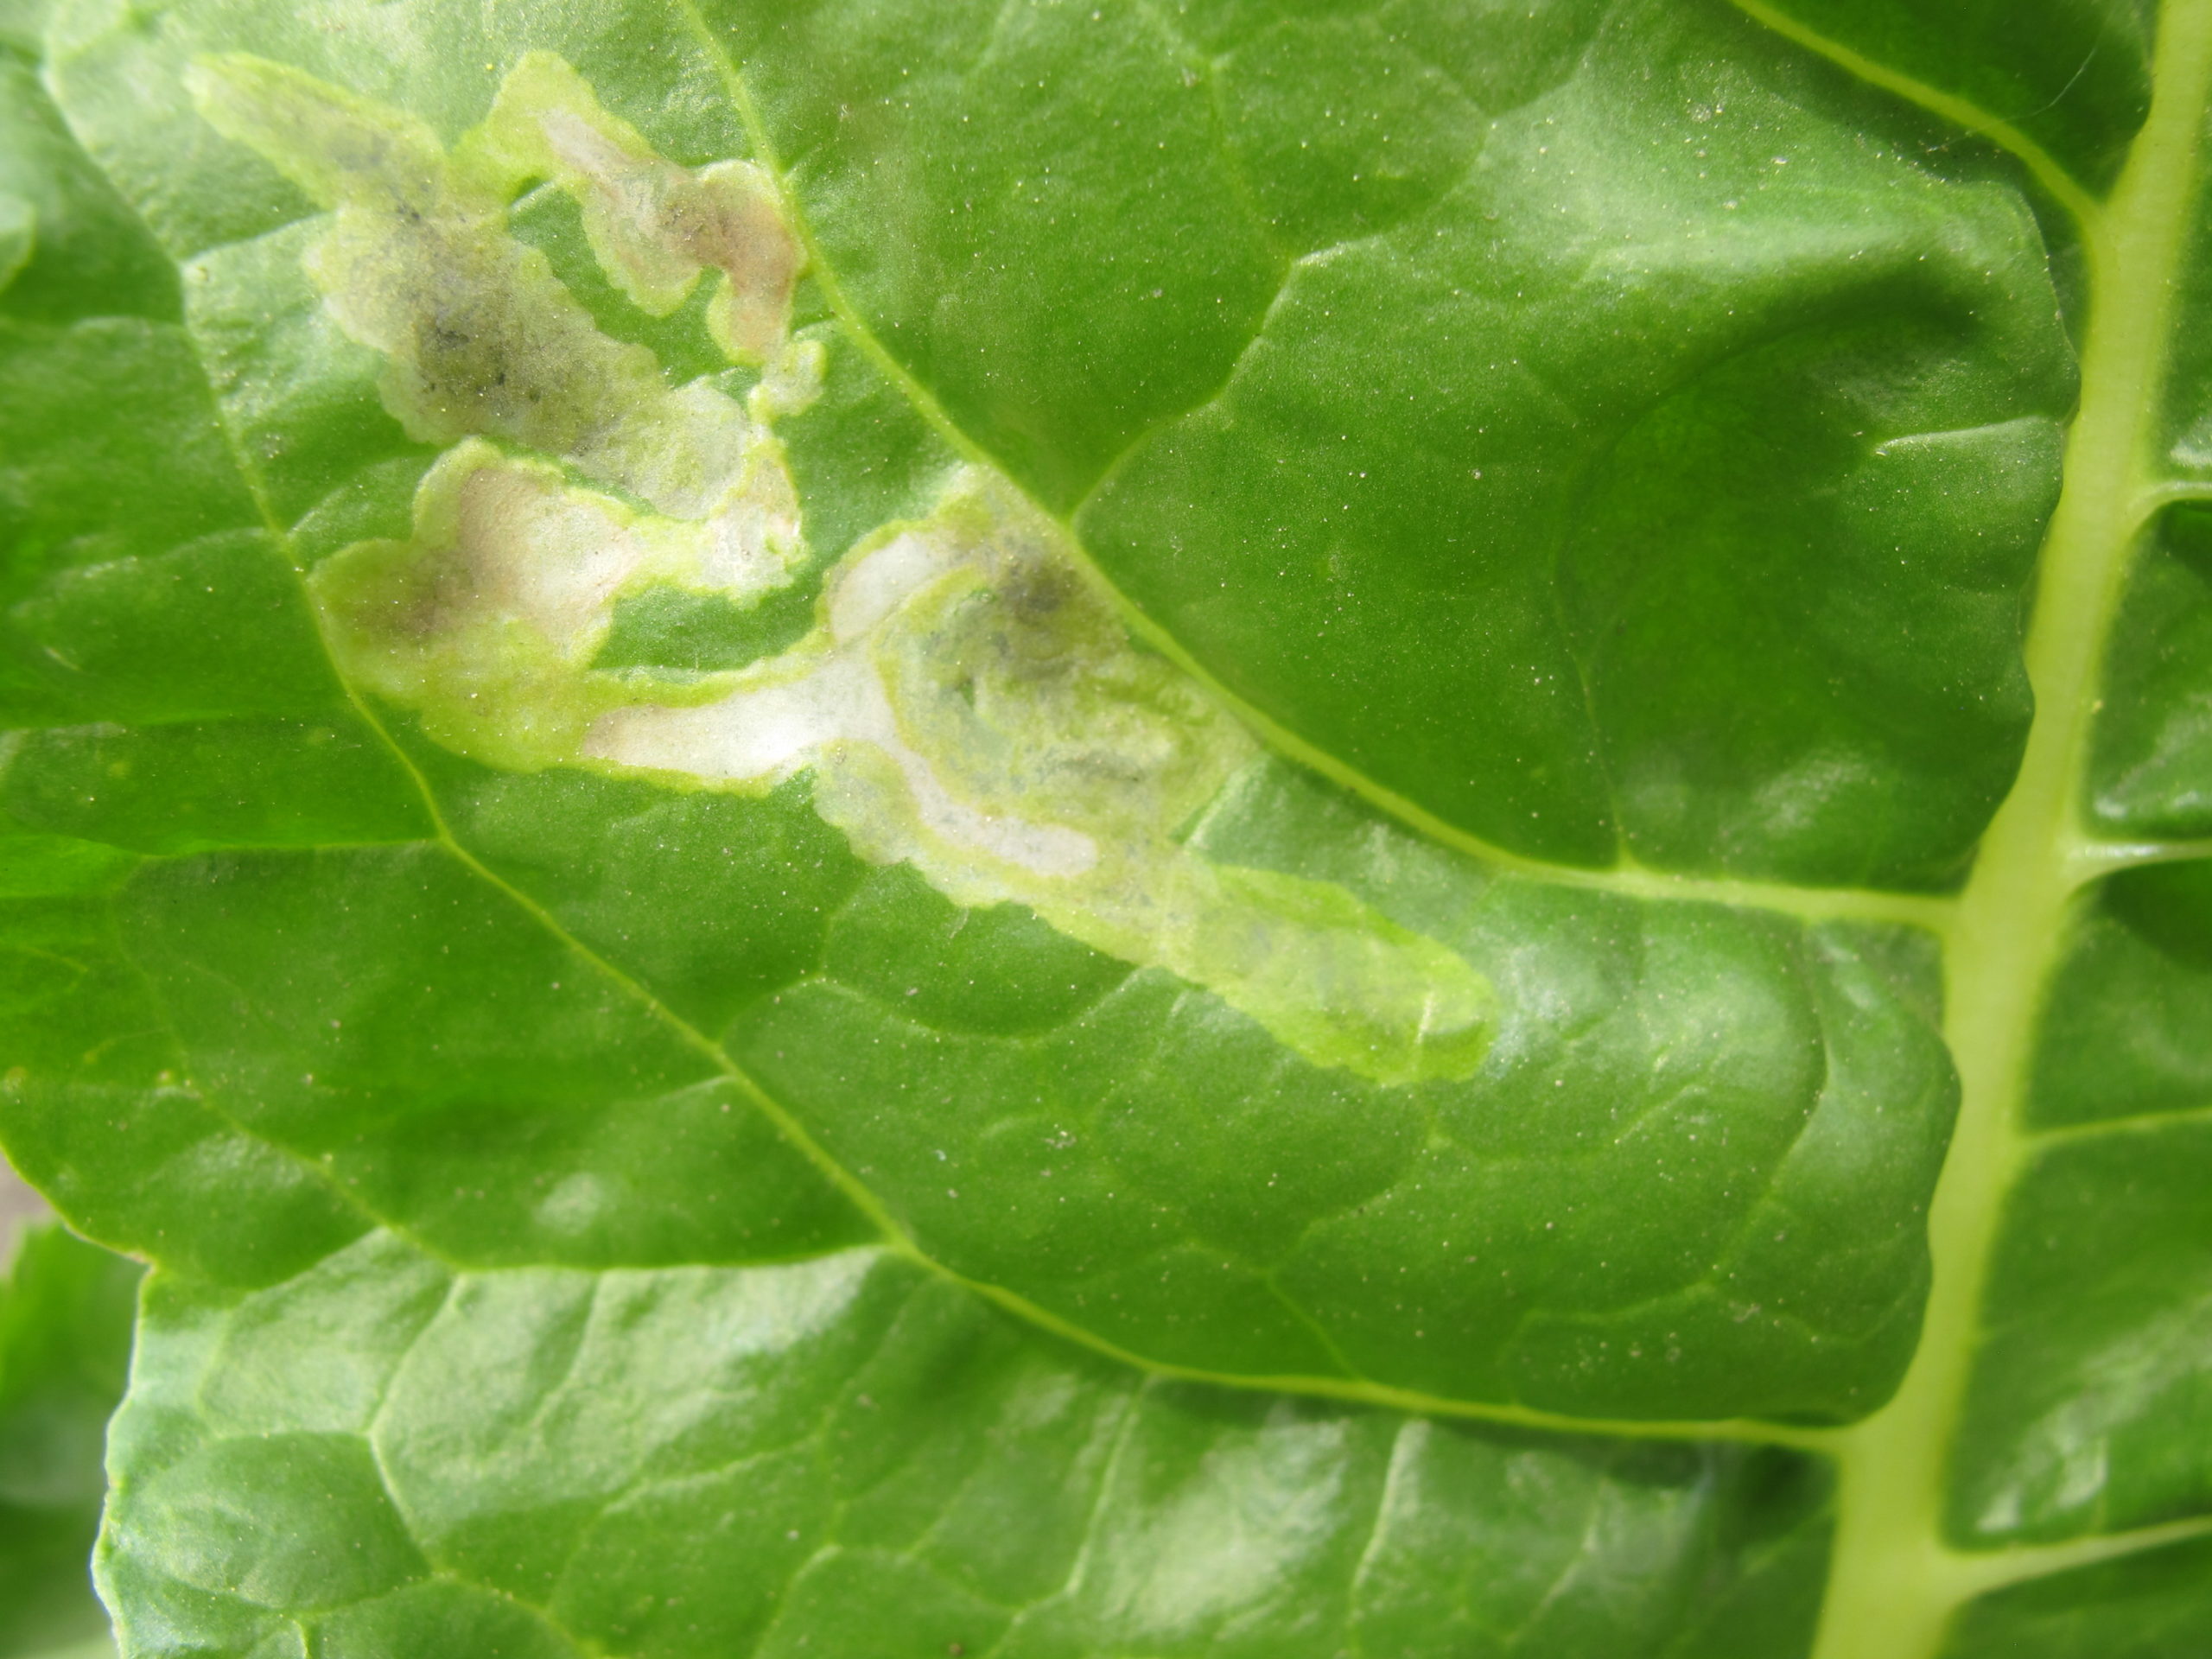
“Leafminers” that affect Utah’s vegetables are usually fly larvae (maggots) from the family Agromyzidae. They feed on the tissues inside the leaves of various plants, including leafy greens like spinach, lettuce, and chard. Their feeding creates distinctive serpentine tunnels or mines on the leaves, causing damage to the foliage.
Identification: Leafminer larva are tiny, maggots with a yellow or pale green color. You may need a magnifying glass to observe them within the mines. Look for irregular, winding tunnels or mines on the leaves of your leafy greens. The mines can vary in size and shape, but they typically have a serpentine pattern and can be brown or translucent.
Management:
- Remove infested leaves: As soon as you notice leafminer damage, remove the affected leaves to prevent the larvae from completing their development and spreading to other plants.
- Proper sanitation: Clean up and dispose of fallen leaves and plant debris, as they can serve as overwintering sites for leafminer pupae.
- Crop rotation: Rotate your leafy greens with unrelated plant species each season to disrupt the leafminer life cycle and reduce the chances of reinfestation.
- Encourage beneficial insects: Attract natural enemies of leafminers, such as parasitic wasps and predatory beetles, to your garden by planting nectar-rich flowers and providing habitat like dense shrubs or mulch.
- Sticky traps: Hang yellow sticky traps near your leafy greens to capture adult leafminer flies. This method can help reduce the population of adult flies and limit egg-laying.
- Reflective mulch: Lay down reflective mulch, such as aluminum foil or silver plastic, around your plants. The shiny surface can deter adult flies from landing and laying eggs on the leaves.
- Chemical Control: If infestations are severe or other methods are unsuccessful, you may consider using insecticides labeled for leafminer control. Choose products specifically formulated for leafminer control in vegetables and follow the instructions on the label carefully. Follow the instructions on the product label for application rates and timing. Note that application may difficult as the larvae are in between the leaf layers.
Click here for home-use products.
Click here for commercial-use products.
SOLANACEOUS CROPS
Tomato, Pepper, Eggplant, Potato, Tomatillo, etc.
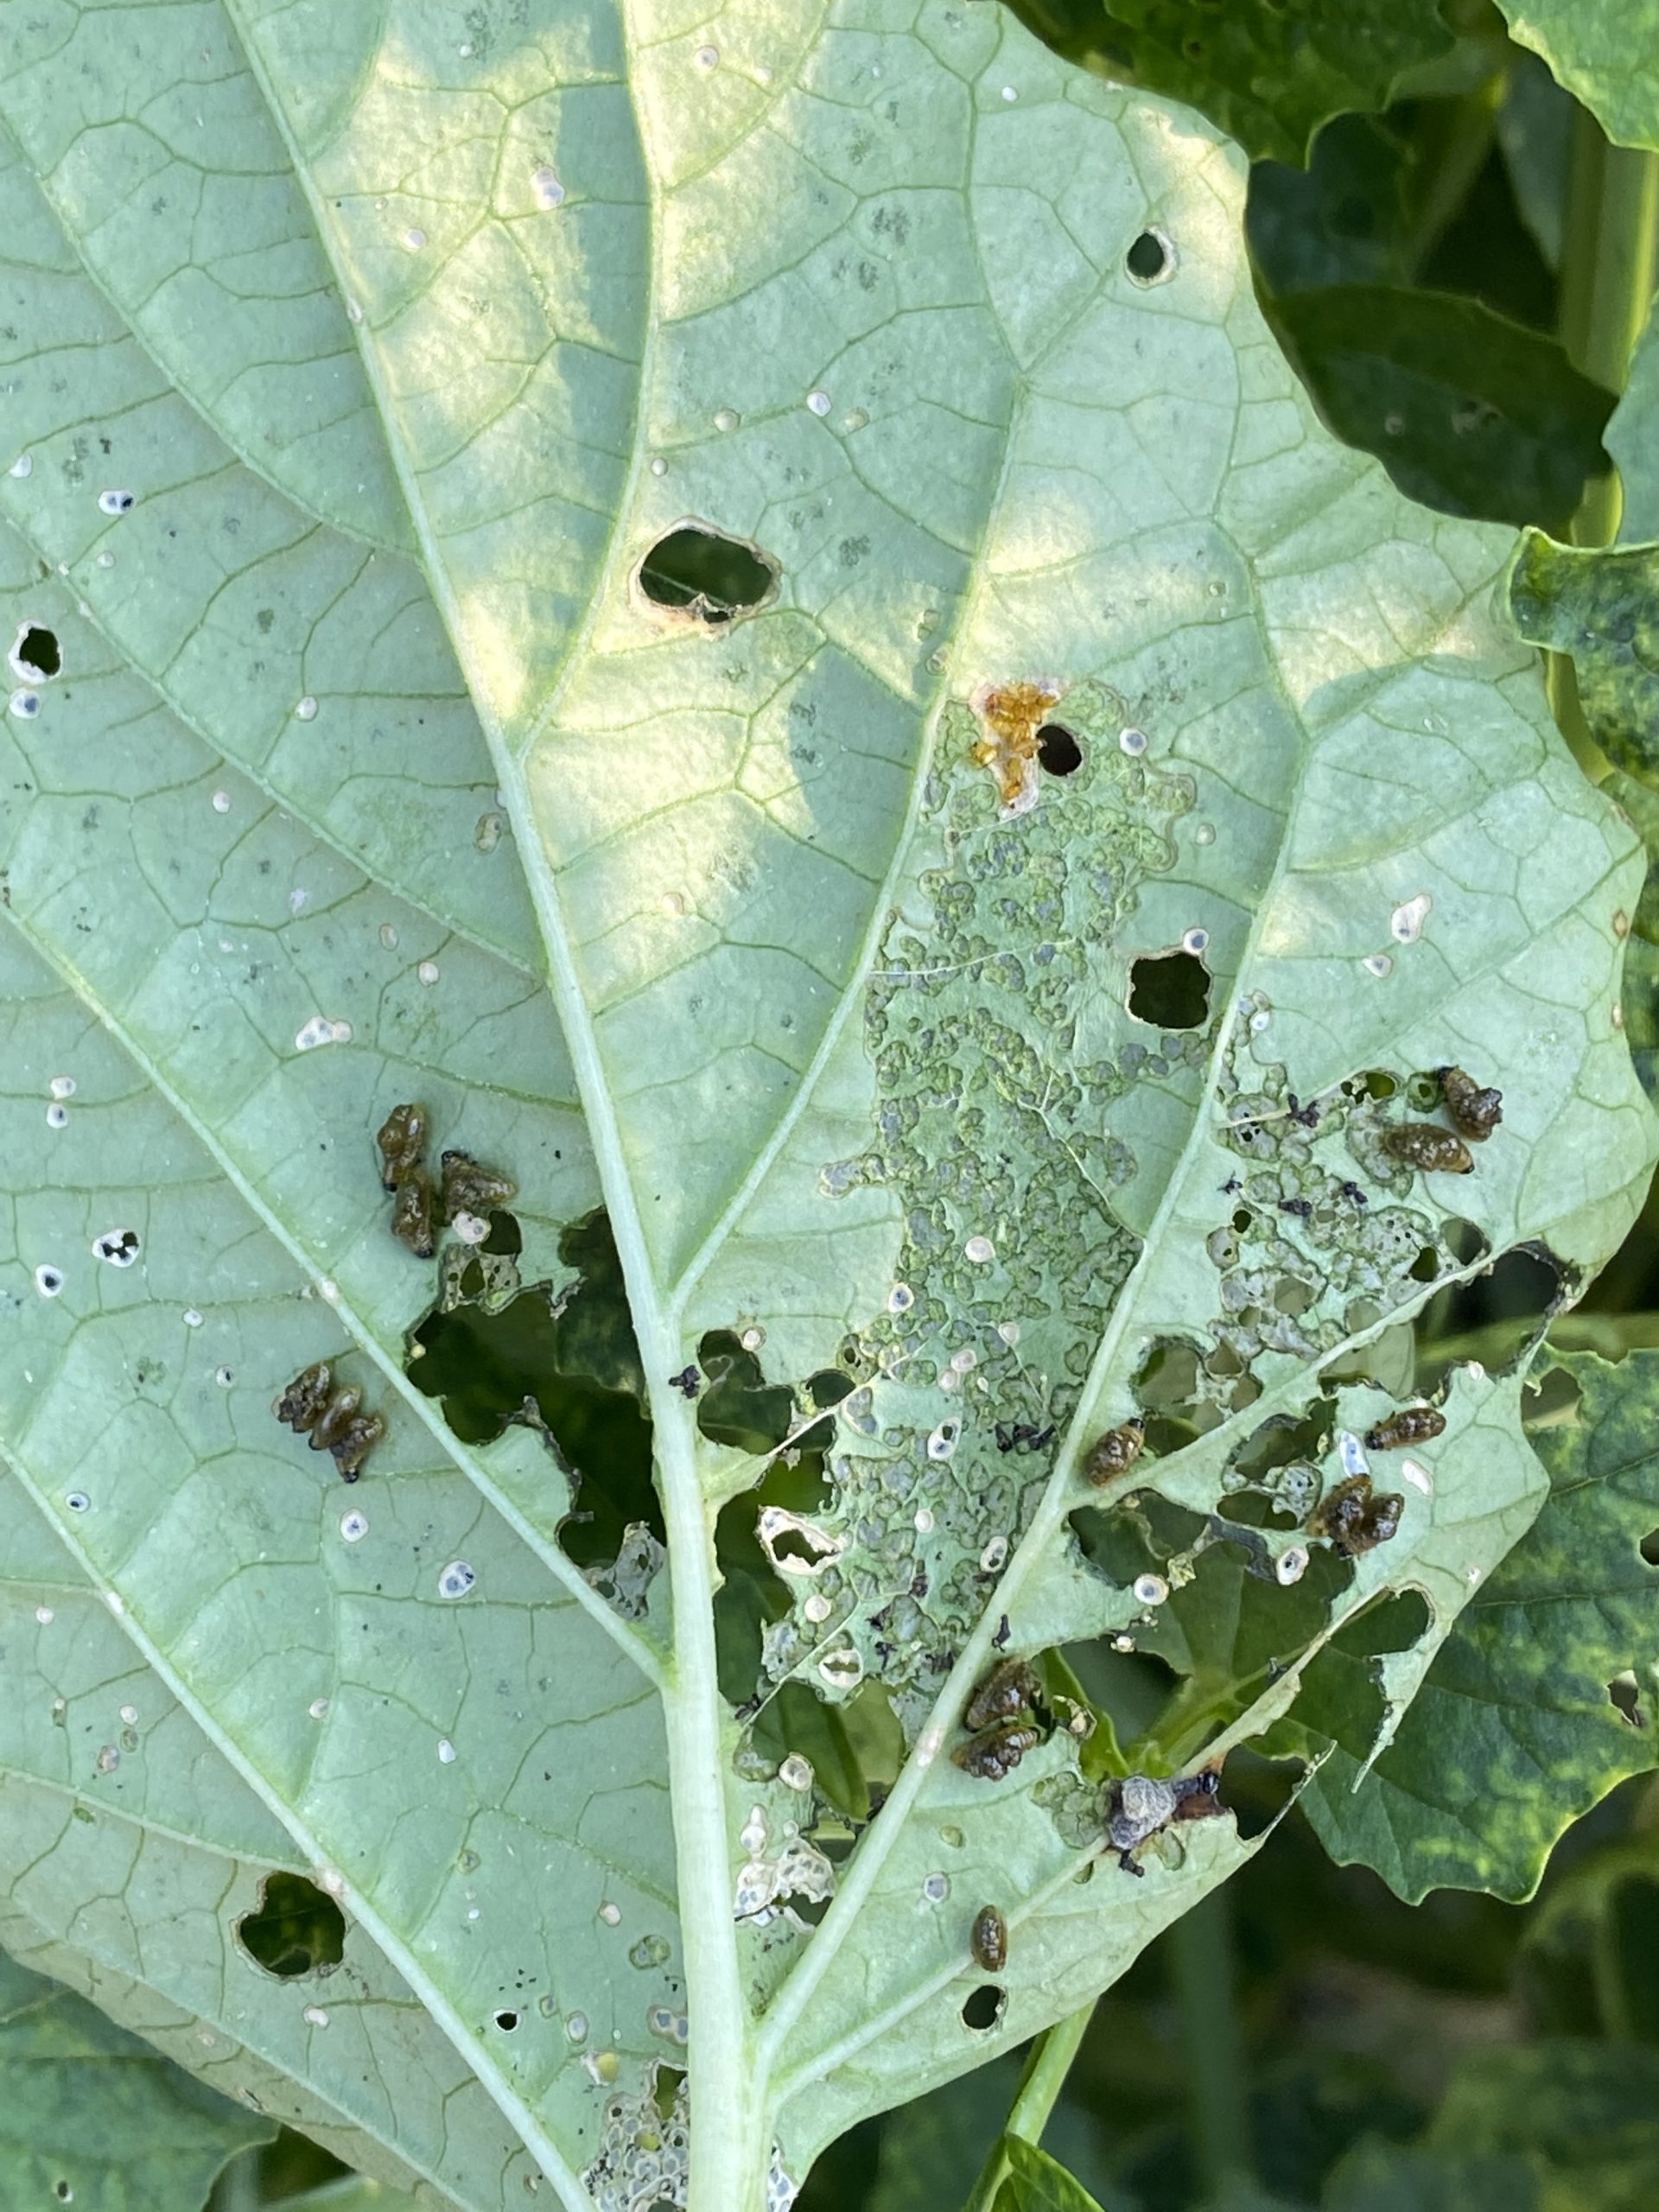
Three-lined Potato Beetles
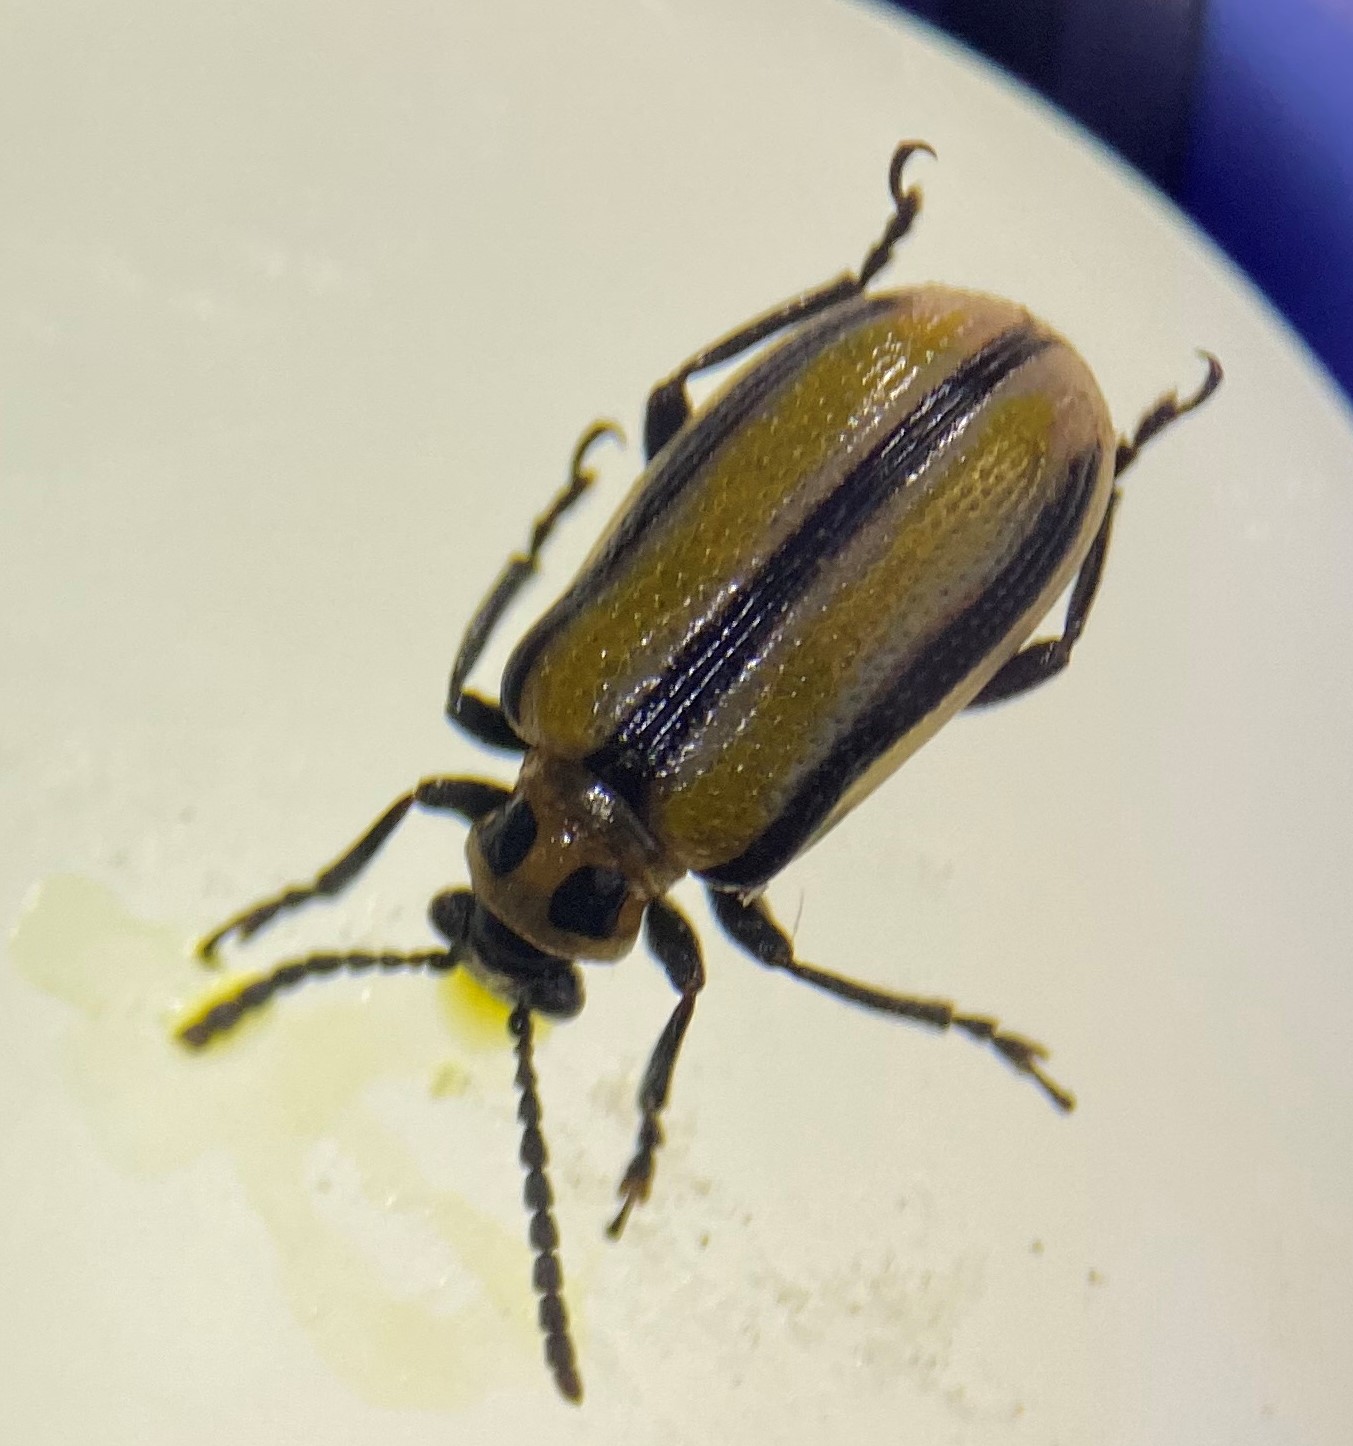
Three-lined potato beetles (Lema daturaphila), can be very problematic on Utah’s tomatillo crops. Once overwintering adults emerge, they lay their eggs on the host crop’s foliage. The larvae hatch in late June or July. Larvae eventually pupate in mid to late summer, reaching the adult stage. Depending on the location and temperatures, the beetle can complete up to two generations per year, but more likely just one generation in Utah.
Identification: Adult beetles are oval-shaped and approximately 10 millimeters long. They have yellow-orange bodies with ten distinctive black stripes on their wing covers. The head is black with a pair of antennae. The larvae are plump, orange, and have a segmented body. They have a humpbacked appearance and are covered in black spots.
Management
- Handpicking: Inspect your tomatillo plants regularly, especially the undersides of leaves, and manually remove adult beetles and larvae. Drop them into a bucket of soapy water to kill them.
- Row covers: Cover your tomatillo plants with lightweight floating row covers to physically exclude the beetles. This method is most effective when applied early in the season before beetles are present.
- Beneficial insects: Encourage beneficial insects like ladybugs and lacewings that feed on potato beetle larvae. Planting flowers that attract these beneficial insects can help increase their presence in your garden.
- Chemical controls: If other methods fail and the infestation is severe, you may consider using insecticides specifically labeled for potato beetles. Choose a product suitable for use on tomatillos and follow the instructions carefully. Use chemicals as a last resort and avoid harm to beneficial insects.
Click here for Home-Use Products
Click here for Commercial-Use Products
SWEET CORN AND LEGUMES
Seed Maggots
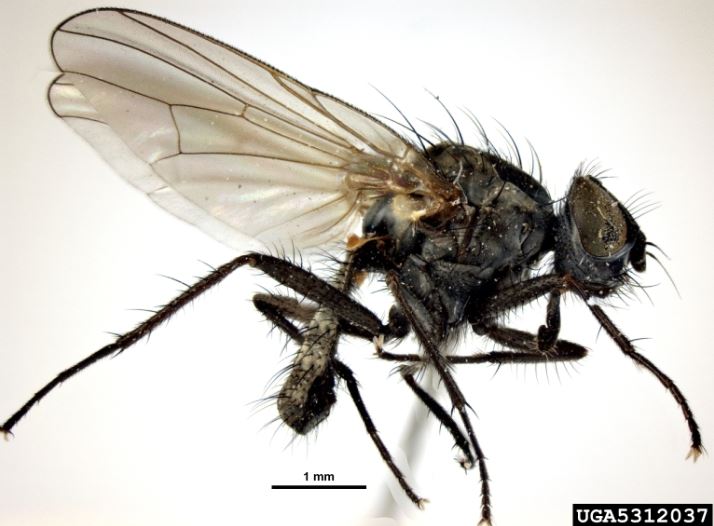
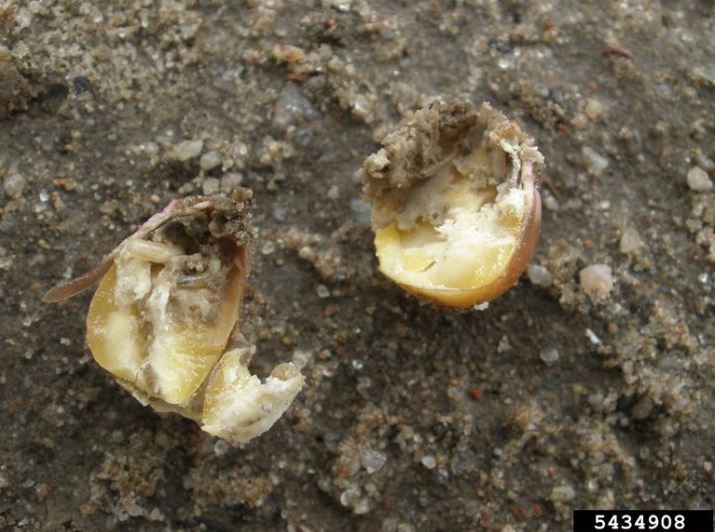
Seed maggots, also known as seedcorn maggots, can affect crops like corn and beans during the germination and early growth stages. These pests are actually the larvae of small flies, including the seedcorn maggot (Delia platura) and the bean seed fly (Delia florilega). Here’s how you can identify and manage seed maggots in corn and beans:
Identification: If you carefully dig around the affected seeds or seedlings, you may find small, legless white or yellowish larvae (maggots) with a pointed head. Seed maggots feed on germinating seeds and seedlings. Look for seeds that fail to germinate or seedlings that appear stunted, wilted, or discolored.
Management
- Planting time: Delay planting until the soil has warmed up adequately. Cooler soil temperatures can attract seed maggots, so planting when soil temperatures are consistently above 50°F (10°C) can help reduce infestation.
- Crop rotation: Practice crop rotation by avoiding planting corn or beans in the same location each year. Seed maggots overwinter in the soil, and rotating crops helps break their life cycle.
- Seed treatment: Consider treating seeds with insecticides labeled for seed treatment. These treatments provide protection to the seeds and emerging seedlings. Follow the instructions and guidelines on the product label for proper application.
- Clean planting area: Remove and destroy any crop debris and weeds in the planting area before sowing seeds. This helps reduce the potential habitat and food sources for the pests.
- Proper soil preparation: Prepare the soil well in advance by tilling or turning it over to expose the maggots and pupae to predators and environmental conditions that may reduce their population.
- Seed spacing and depth: Plant seeds at the appropriate spacing and depth as recommended for the specific crop. Proper spacing and depth can reduce attractiveness and vulnerability to seed maggots.
- Floating row covers: Use floating row covers over newly planted seeds or emerging seedlings. These covers act as a physical barrier and prevent the flies from laying eggs on the seeds or accessing the seedlings. Remove the covers once the plants have grown enough to withstand pest pressure or require pollination.
- Encourage natural predators of seed maggots, such as parasitic wasps and predatory beetles, by providing habitat diversity and avoiding the use of broad-spectrum insecticides that may harm these beneficial insects.
- Monitoring and early intervention: Regularly monitor your crops for signs of infestation. If you detect seed maggots early, you may be able to salvage the remaining unaffected seeds or seedlings and take appropriate control measures, such as seed treatment or targeted insecticide application.
Click here for commercial-use products.
ALL VEGETABLE CROPS
Grasshopper Nymphs
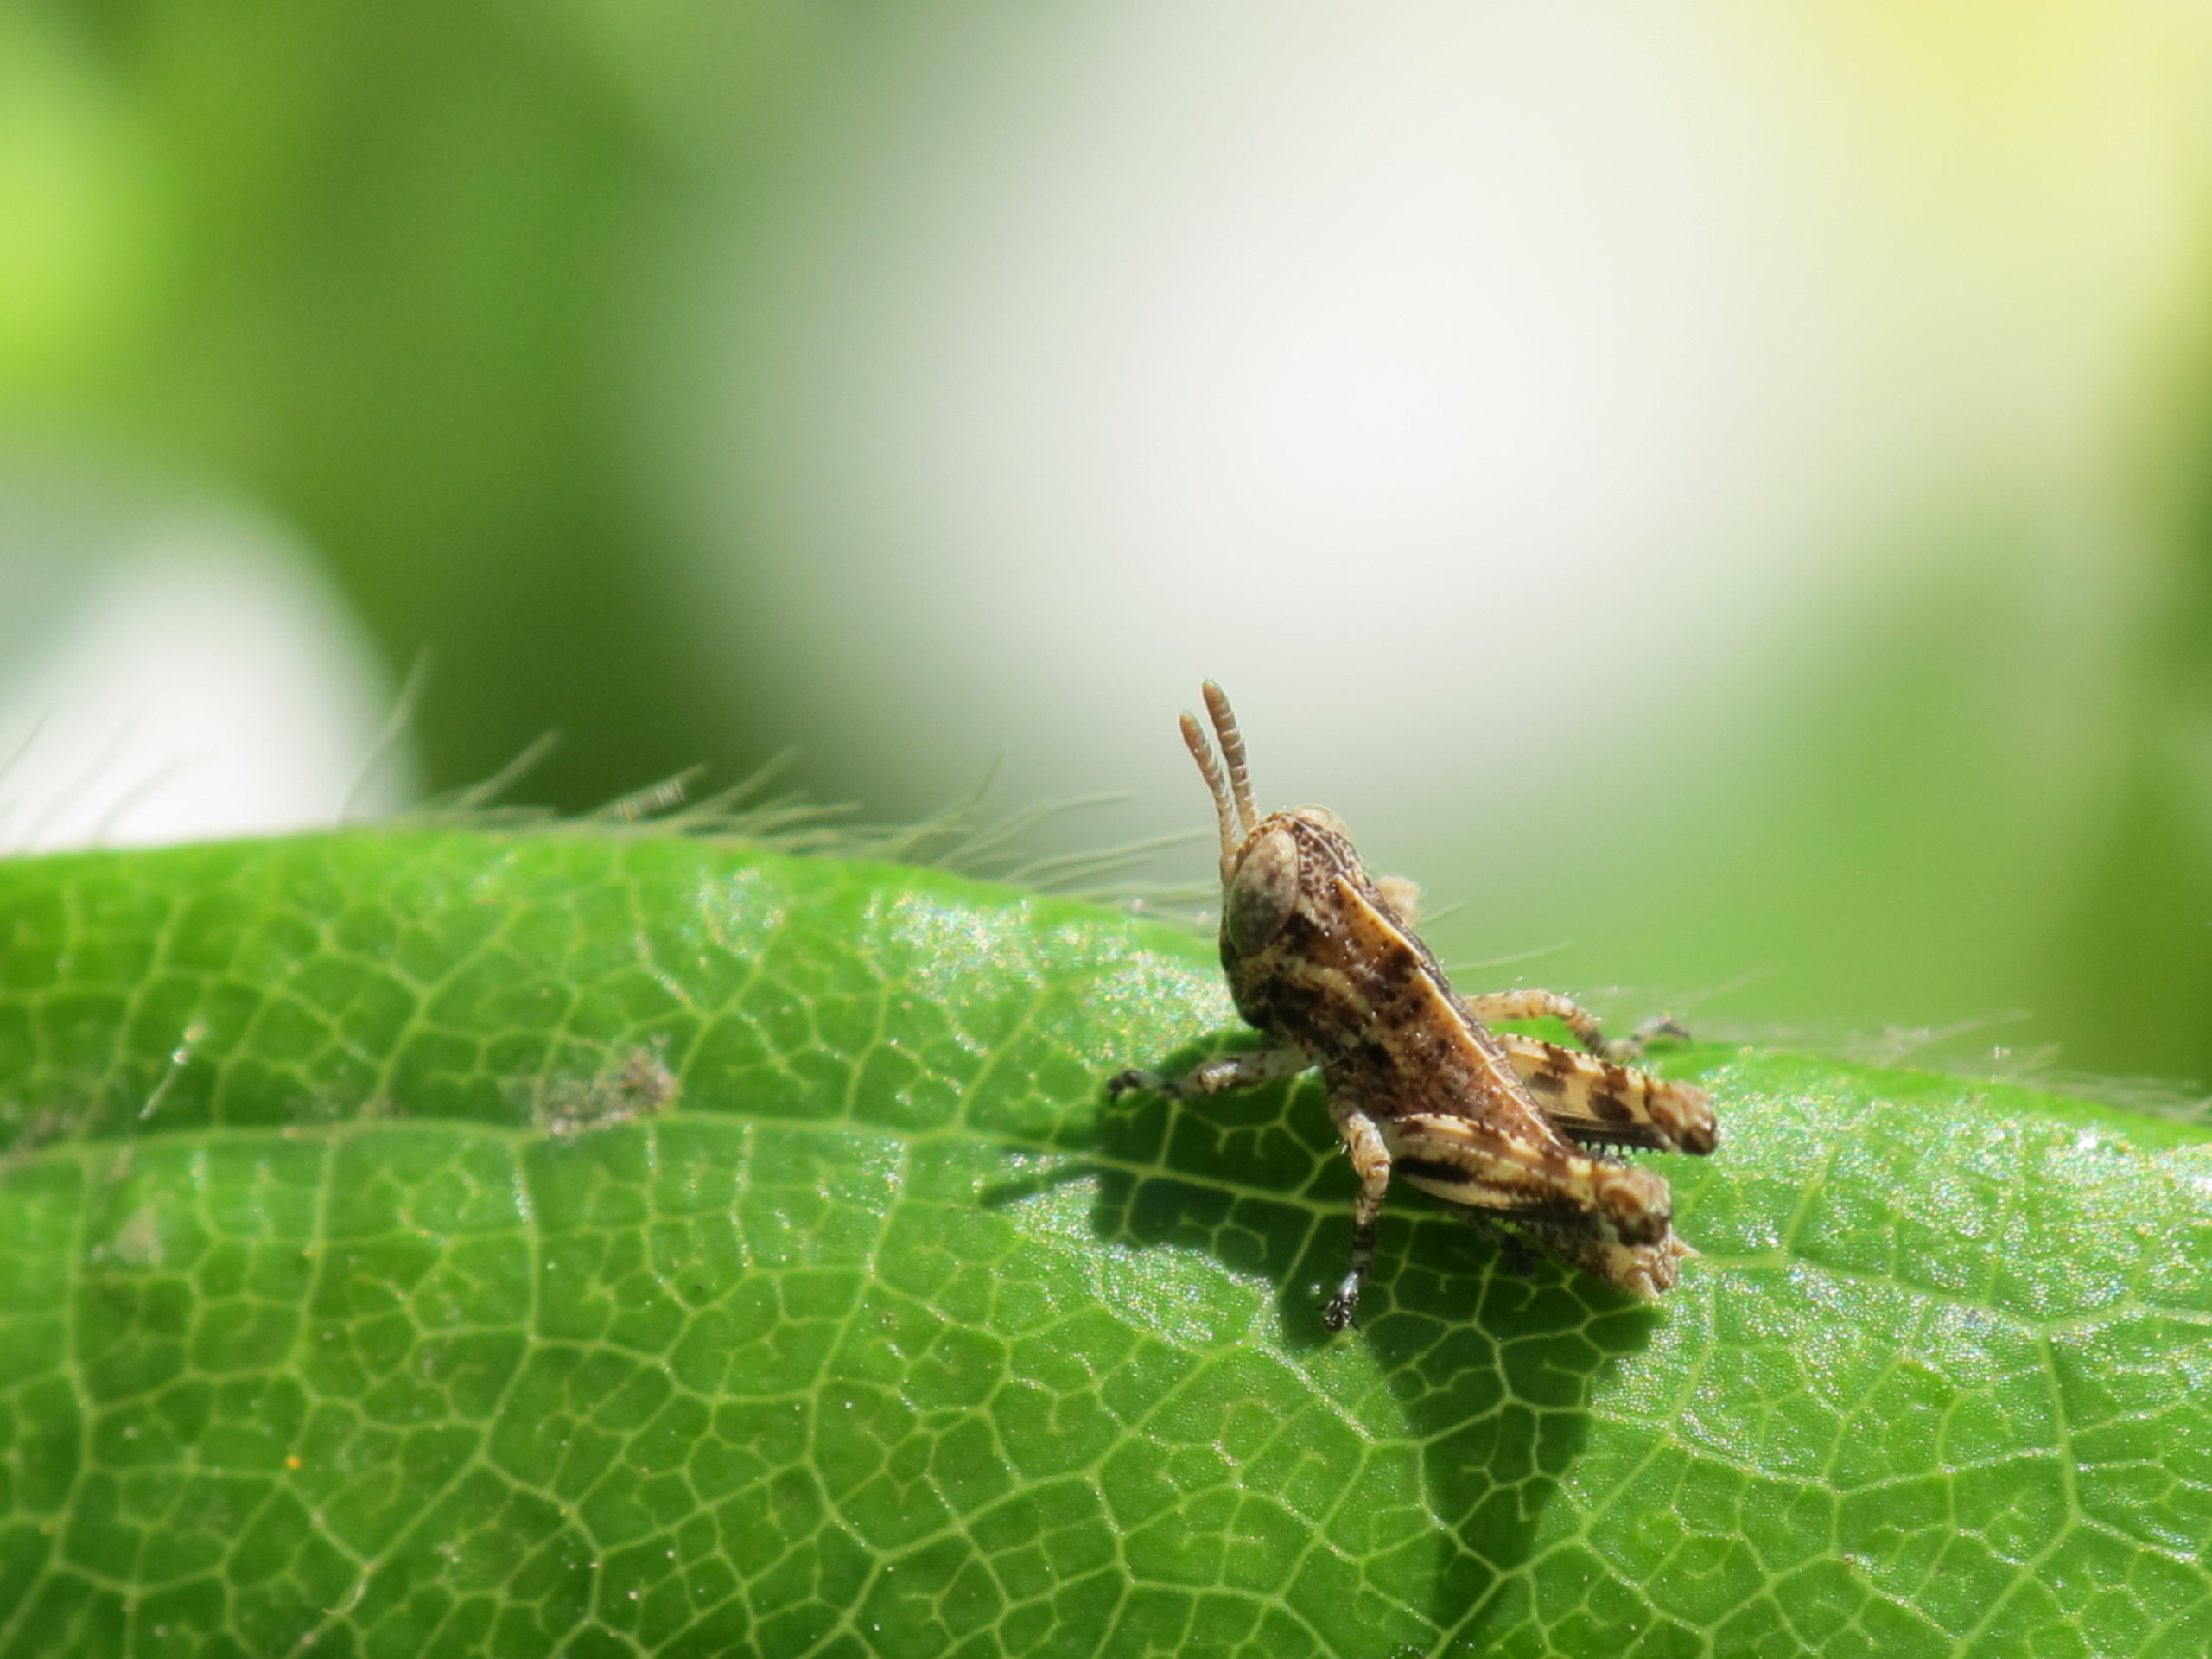
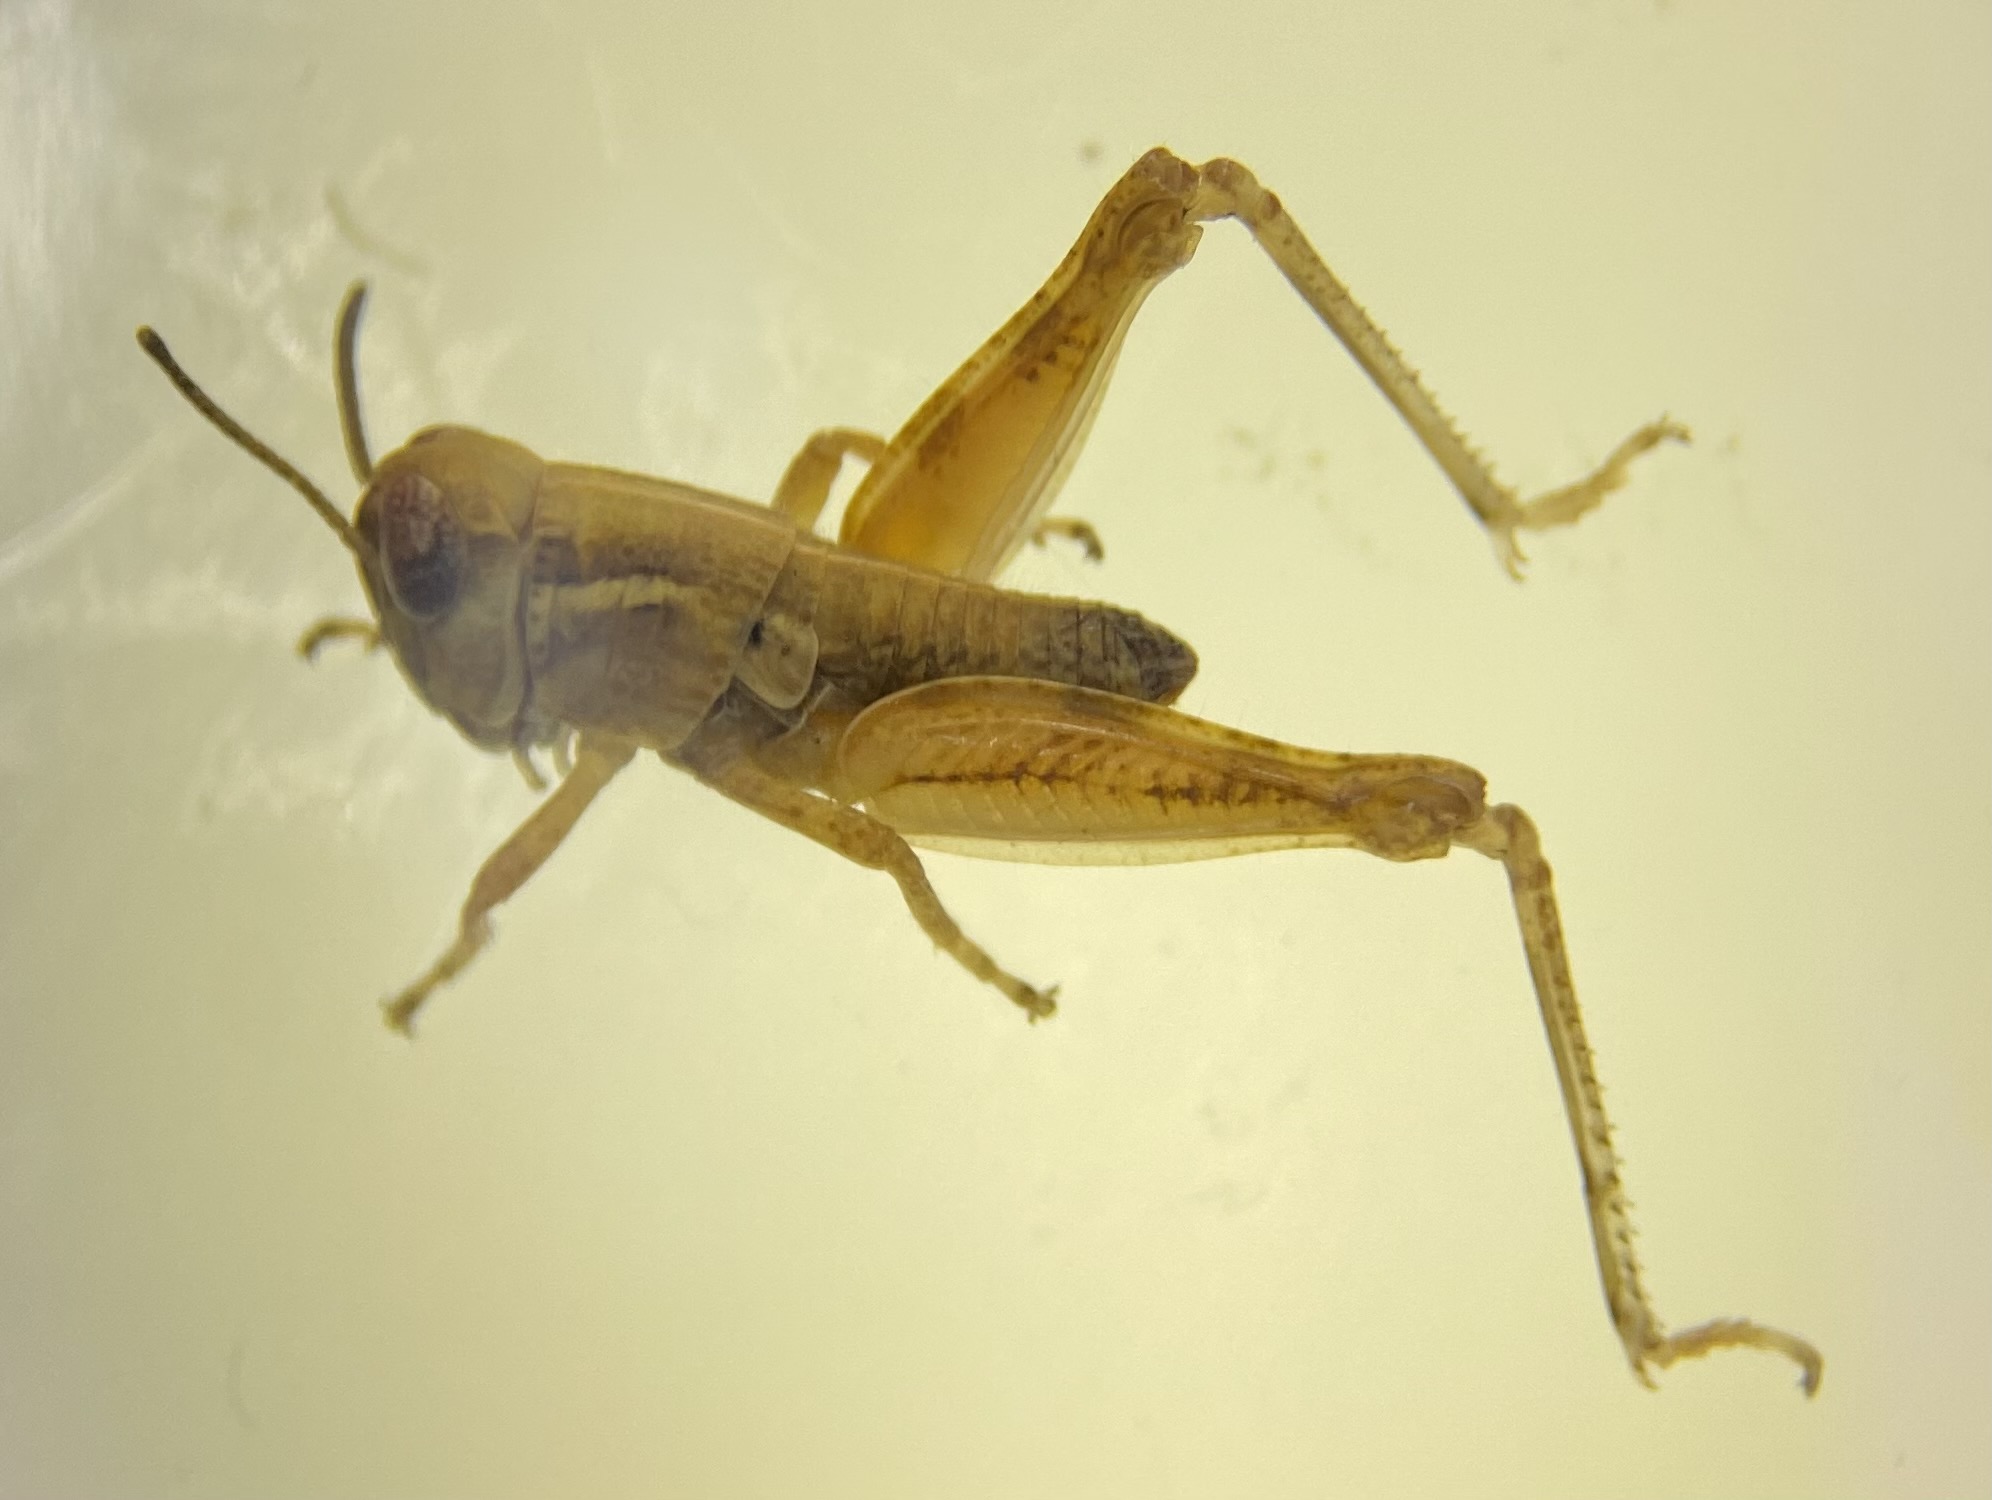
Identifying and managing grasshopper nymphs in home and commercial vegetable production requires careful observation and prompt action.
Identification: Grasshopper nymphs resemble miniature versions of adult grasshoppers but lack wings. They have a similar body shape with long hind legs and distinctive chewing mouthparts. Nymphs are usually smaller and have a more vibrant coloration than adult grasshoppers. They can be green, brown, or a combination of both, depending on the species.
Regularly inspect your garden, paying close attention to the plants most susceptible to grasshopper damage. Look for signs such as partially eaten leaves or grasshoppers themselves, both adults and nymphs. Nymphs tend to cluster together, so if you spot one, there are likely more nearby.
Management:
- Remove hiding places: Grasshopper nymphs often hide in tall grass, weeds, and debris. Keep your garden clean and well-maintained by regularly mowing the grass, removing weeds, and clearing away any unnecessary debris. This will help reduce their shelter and make it harder for them to thrive.
- Physical barriers can help protect your plants from grasshopper nymphs. Install barriers like netting, floating row covers, or mesh screens around your garden. Ensure that the barriers are tall enough to prevent the nymphs from crawling over them.
- Encourage natural predators that feed on grasshopper nymphs to inhabit your garden. Birds, including chickens and ducks, can be effective in controlling grasshopper populations. You can also consider releasing beneficial insects like some species of nematodes, which specifically target grasshoppers.
- Site sanitation: Remove any plant debris, grass clippings, or fallen fruits from the garden regularly. Grasshoppers are attracted to decaying plant material, and keeping the garden clean can discourage their presence.
- Chemical control methods for grasshoppers typically involve the use of insecticides specifically designed to target and eliminate grasshopper populations. These insecticides may be applied as sprays or baits, targeting grasshopper nymphs or adults directly. It is important to follow the instructions on the insecticide label carefully, taking precautions to protect beneficial insects and minimizing the impact on the environment. Click here for more information.
Remember that managing grasshopper nymphs requires consistent efforts and a combination of strategies. Monitoring your garden regularly, identifying the nymphs, and taking early action will help prevent them from causing extensive damage to your plants.
PRODUCTION INFORMATION
Suppressing Weeds with Straw
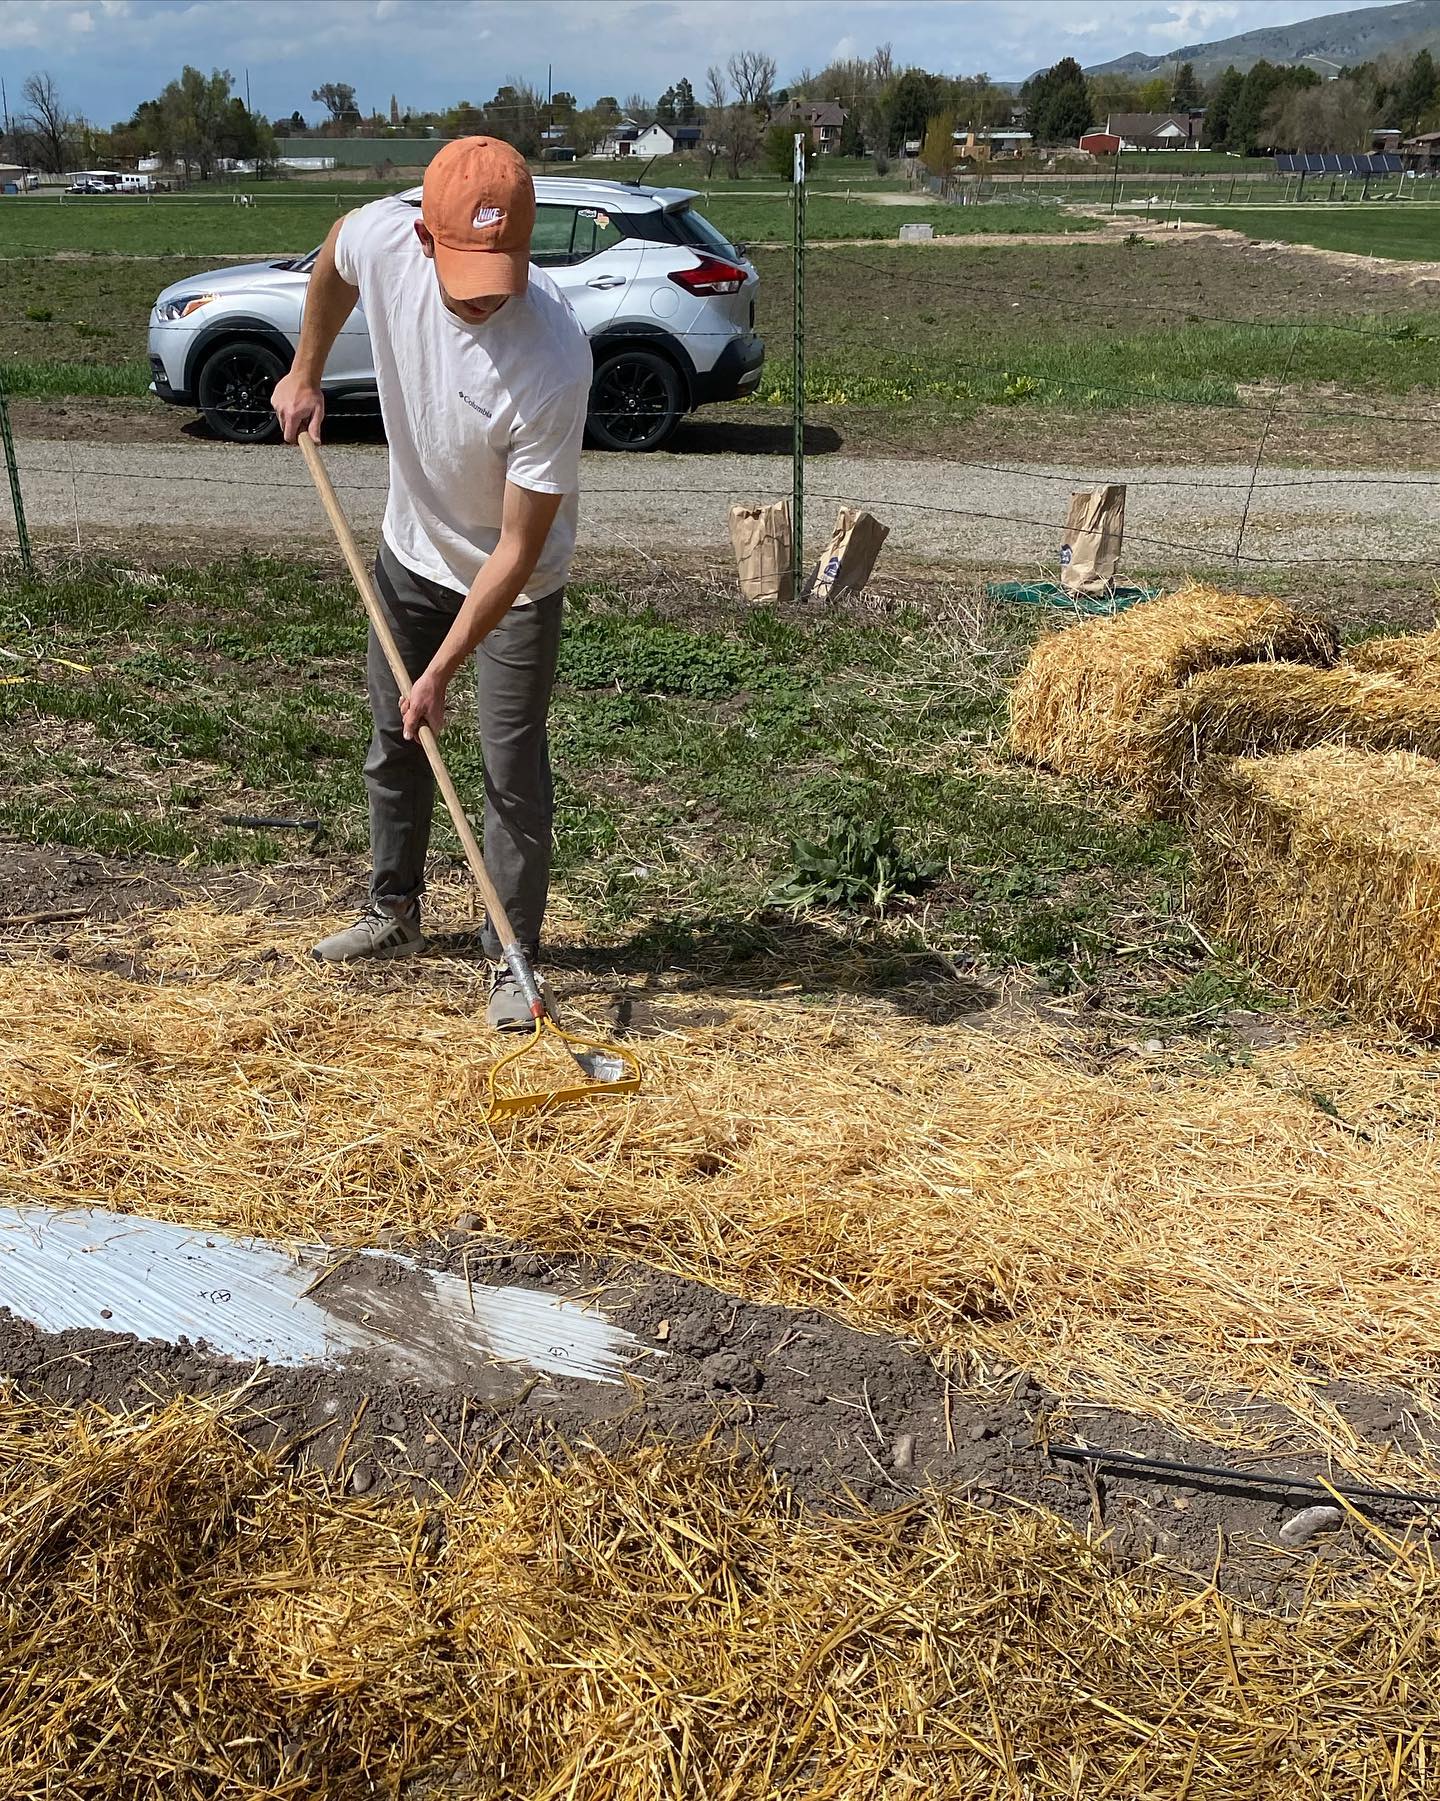
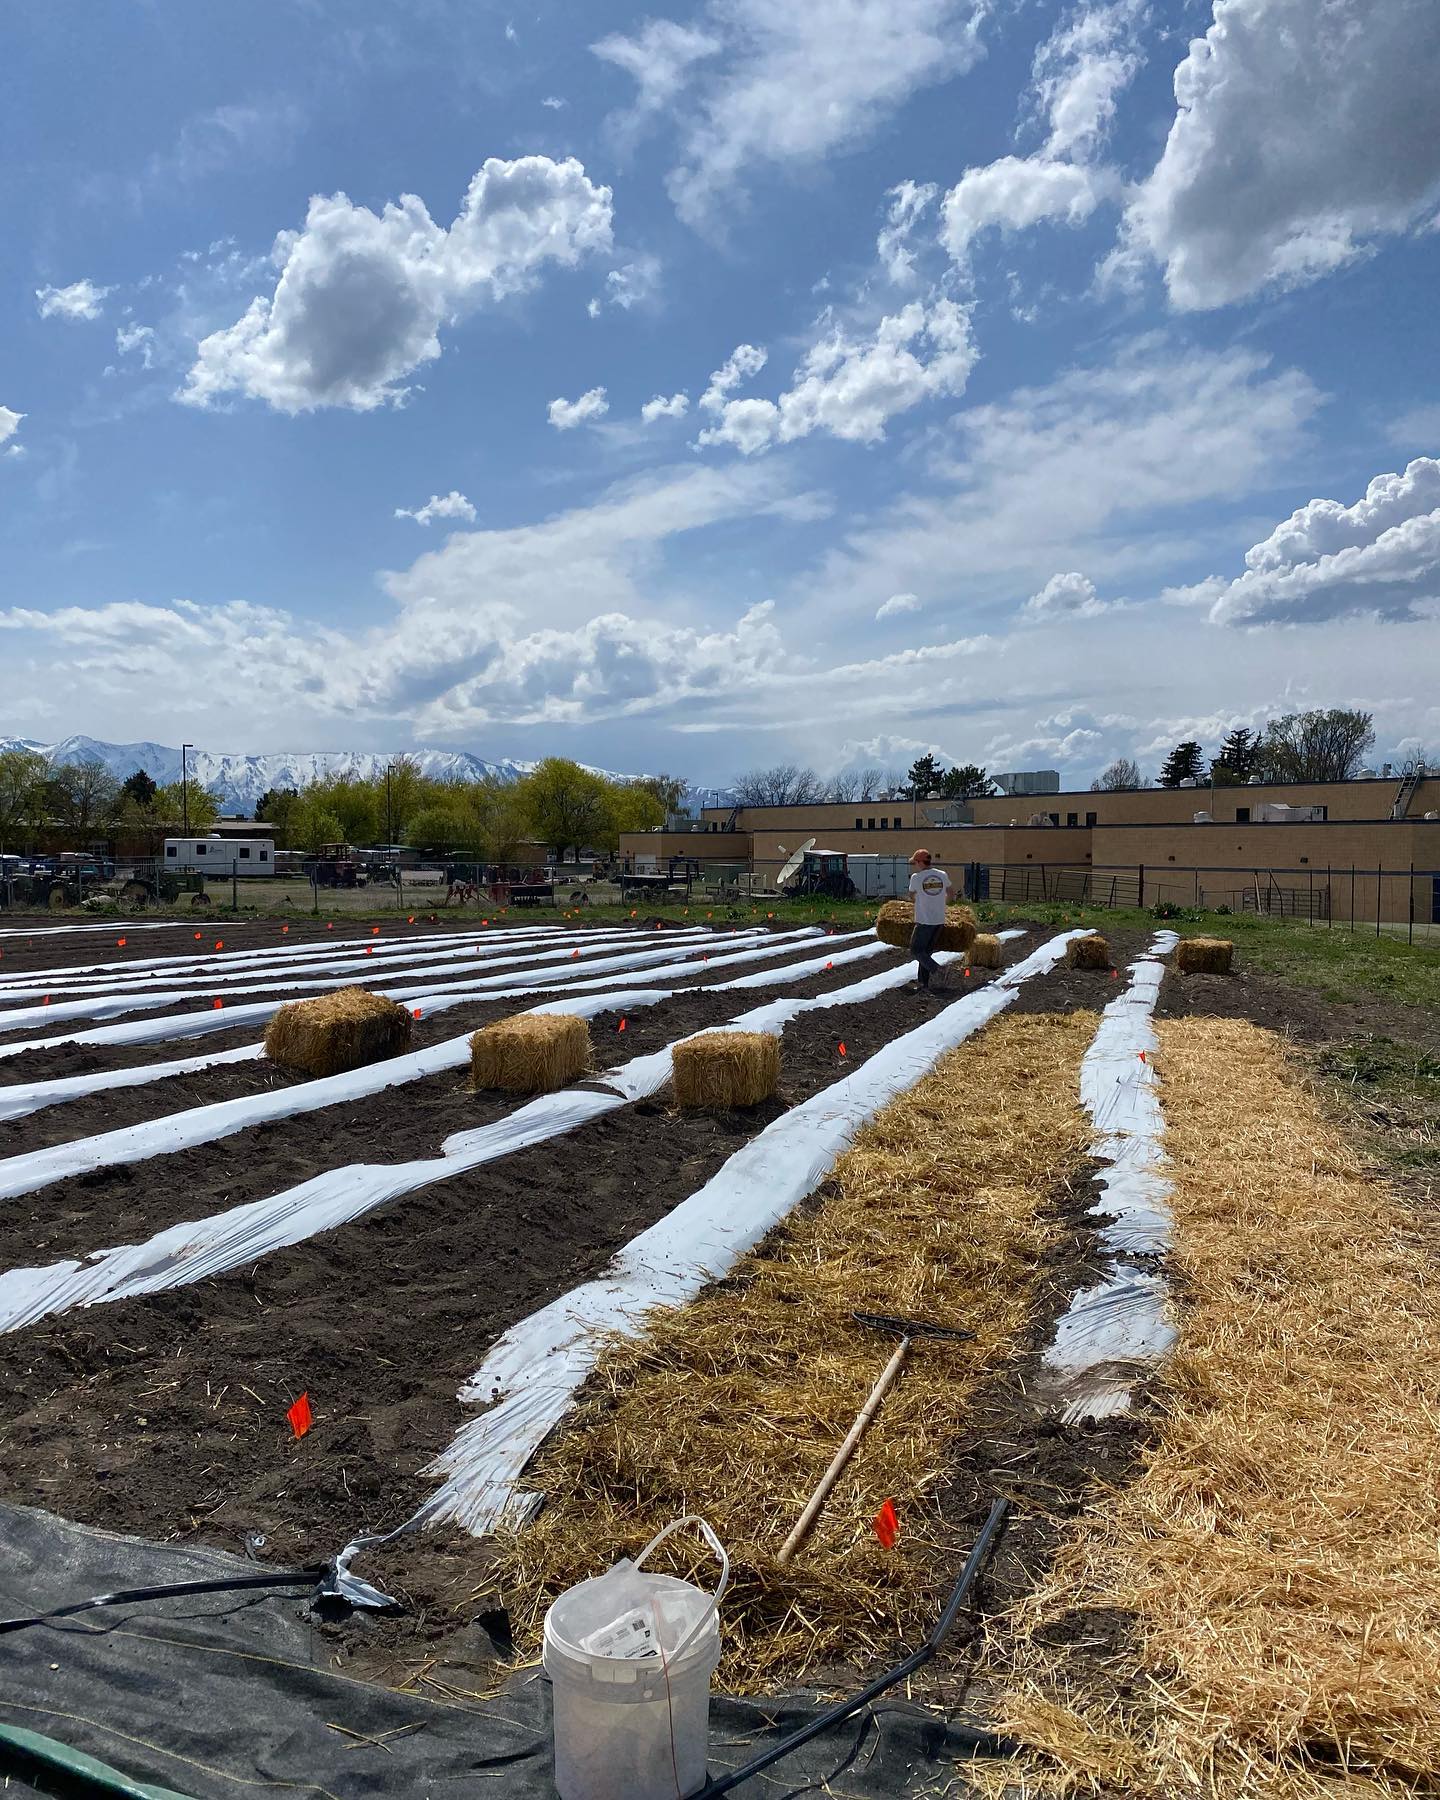
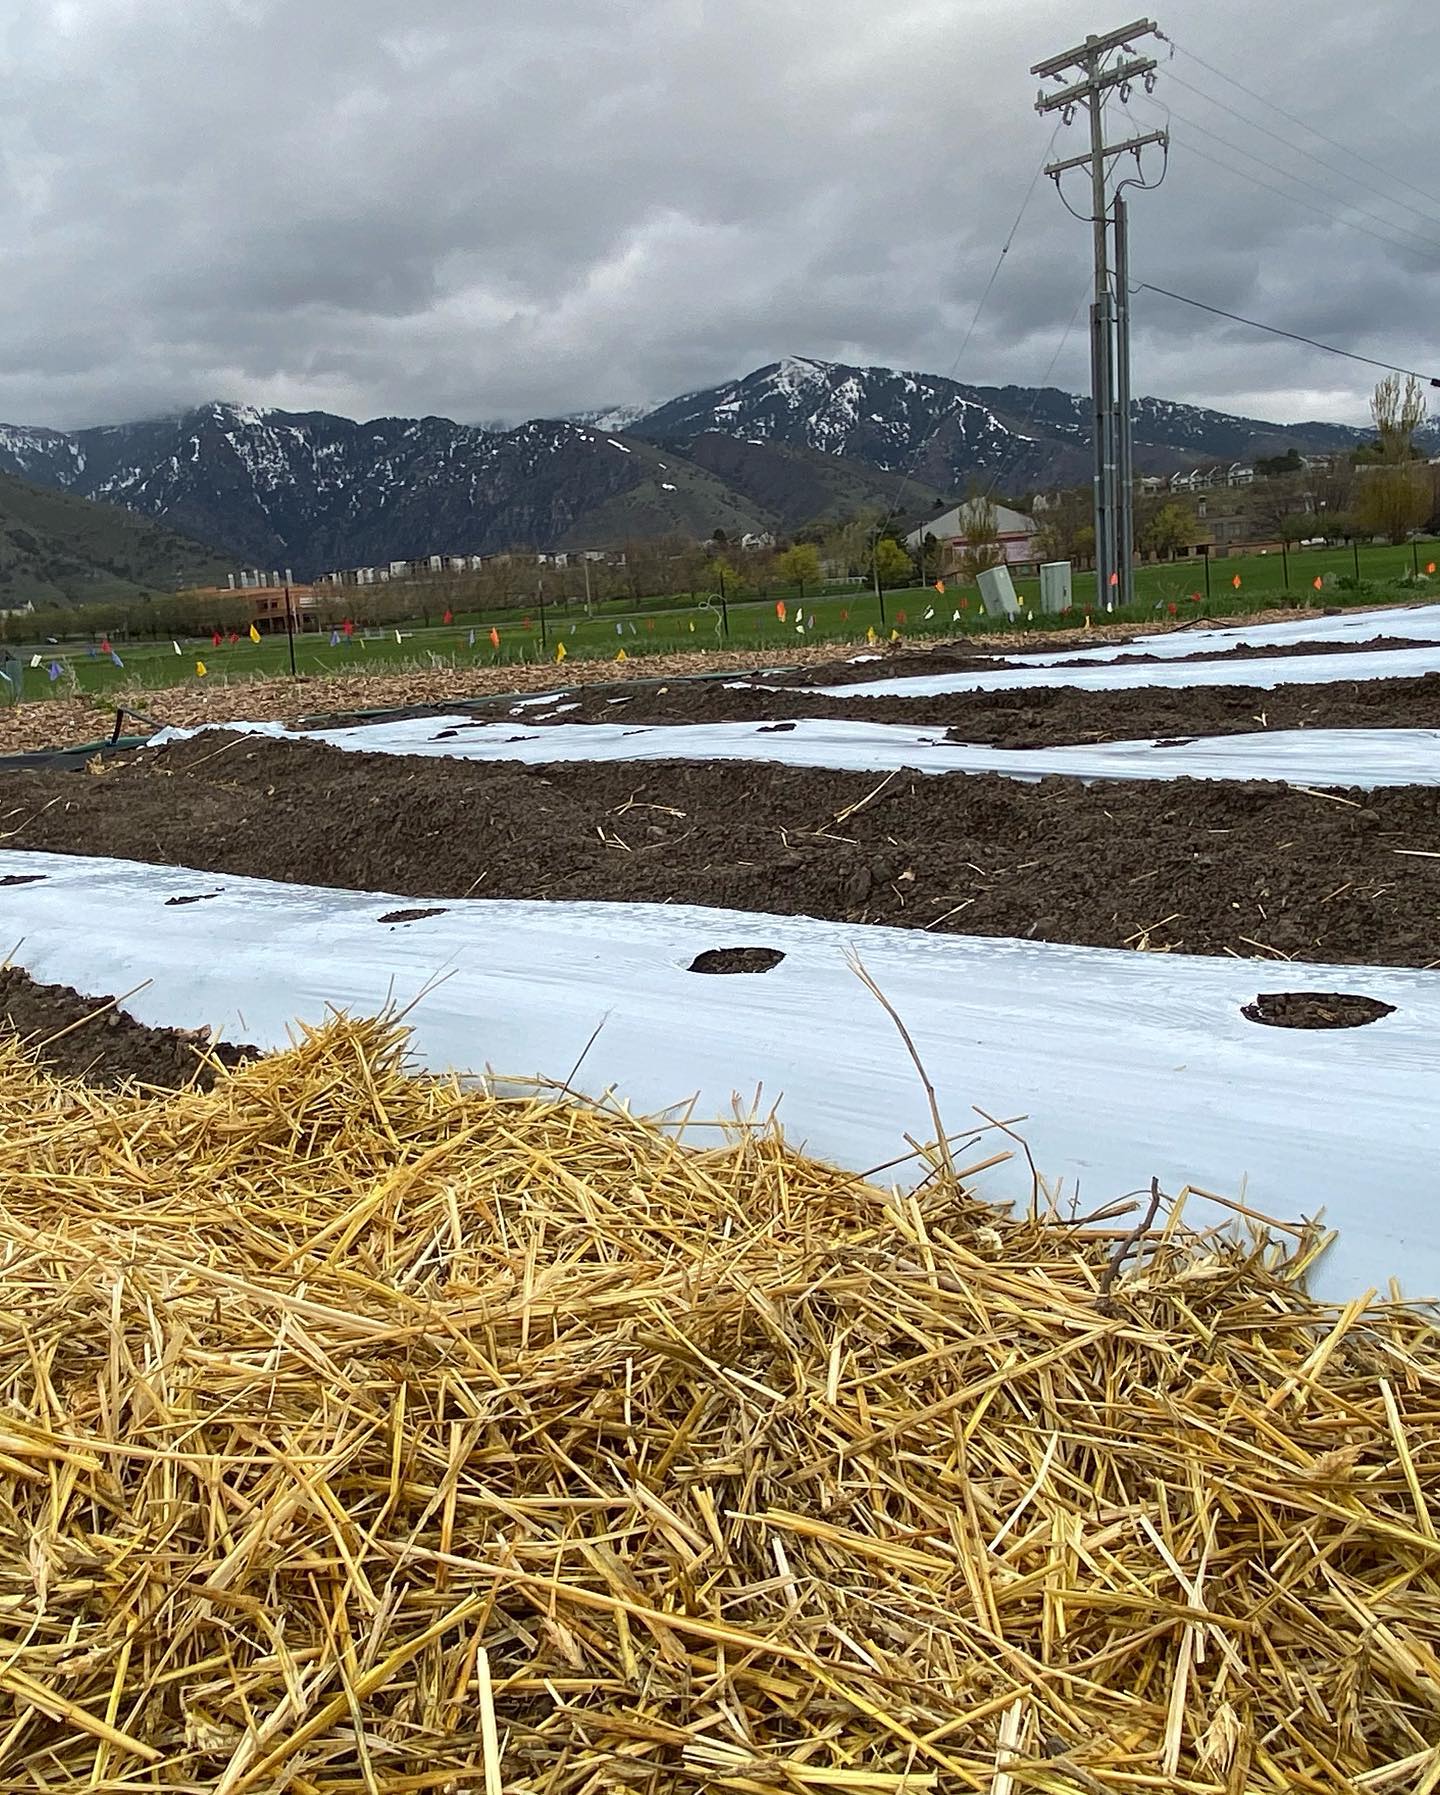
Using straw mulch for weed suppression in small-scale agriculture is a common and effective practice. Straw mulch refers to a layer of straw, typically wheat or rice straw, that is spread over the soil surface around plants. This mulch layer helps to control weeds by preventing their growth and establishment, while also providing other benefits for plant health and soil.
Straw mulch forms a physical barrier between the soil and the surrounding environment, preventing weed seeds from germinating and reaching the sunlight they need to grow. It blocks the light that triggers weed seed germination, thus reducing weed emergence. When using straw mulch for weed suppression, it is essential to follow these best practices:
- Apply the mulch layer around established plants when they are well-established and have reached an adequate size to compete with weeds.
- Ensure the mulch layer is thick enough (around 2-4 inches) to effectively block weed growth and conserve moisture.
- Leave some space around the stems of the plants to prevent rot and discourage pests.
- Use weed-free straw to minimize the introduction of weed seeds into the growing area.
- Monitor the mulched area regularly and remove any weeds that manage to emerge promptly.
By implementing straw mulch as a weed suppression technique in small-scale agriculture, farmers can reduce the need for herbicides and manual weeding, save water, improve soil health, and promote the growth of desired crops while minimizing weed competition.